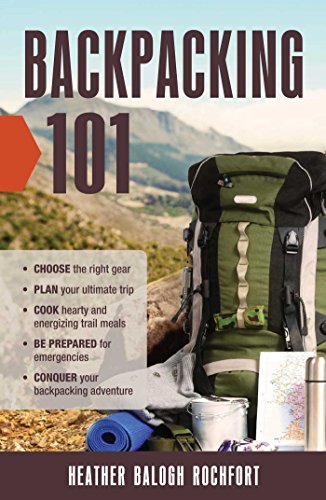
Backpacking Trip Checklist: Essential Gear & Planning Guide
Everything you need to pack, plan, and prepare for a safe and memorable backpacking adventure. From shelter and sleep systems to nutrition and navigation, this comprehensive checklist ensures you never leave a critical item behind.
START YOUR CHECKLISTWhy a Backpacking Trip Checklist Matters: Unlike car camping, backpacking leaves no room for extras. Every ounce counts, and forgetting a single essential item can turn a dream trek into an uncomfortable ordeal. This guide walks you through every category of gear, explains what to look for, and helps you build a system that works for your trip length, terrain, and season.
Understanding Your Backpacking Trip Before You Pack
Before writing a single item on your list, define the parameters of your trip. The duration, terrain, elevation gain, weather forecast, and availability of water and resupply points all determine what goes into your pack. A weekend loop through a temperate forest demands a very different loadout than a week-long traverse across alpine terrain.
Start by researching your route thoroughly. Check whether permits are required, whether campfires are allowed, and whether bear canisters are mandatory. Understanding local Leave No Trace principles and national park rules before departure prevents fines and protects the environment. If you are new to overnight hiking, reviewing a backpacking for beginners guide can help you avoid common first-trip mistakes.
Shelter and Sleep System: Your Home on the Trail
Your shelter and sleep system form the foundation of a comfortable backpacking trip. Weight, packed size, and weather resistance are the three factors that matter most. For solo trips, a lightweight one-person tent or a tent hammock offers excellent protection with minimal weight. Couples and small groups often prefer a dome tent or a five-person tent for shared carrying capacity.
Sleep insulation deserves equal attention. A sleeping bag rated for temperatures at least ten degrees below the lowest expected overnight low provides a safety margin. Pair your bag with an insulated double sleeping pad or a foam camping pad to prevent ground heat loss. If you sleep cold or backpack in shoulder seasons, consider an all-in-one sleeping bag and mattress system that eliminates gaps between pad and bag. For a deeper dive into temperature ratings, consult the sleeping bag temperature guide.
Shelter & Sleep Checklist
- Backpacking tent or hammock shelter with rainfly
- Tent stakes and guylines (including spares)
- Sleeping bag rated for expected low temperatures
- Insulated sleeping pad with adequate R-value
- Inflatable pillow or stuff sack for clothing pillow
- Ground tarp or footprint for moisture protection
- Repair kit for tent poles and sleeping pad patches
Backpack and Carry System: Choosing the Right Pack
Your backpack is the single piece of gear that touches every mile of your journey. A pack that fits poorly causes shoulder pain, hip bruising, and fatigue long before your legs give out. For overnight trips, a 50 to 65 liter capacity pack suits most three-season adventures. Multi-day or winter trips may require 70 liters or more.
Look for a pack with an adjustable torso length, padded hip belt, and load-lifter straps. These features transfer weight from your shoulders to your hips, where your body can carry it more efficiently. When loading your pack, place heavy items close to your spine and centered between your shoulder blades. Lighter items like your sleeping bag go at the bottom, while frequently used items such as snacks and maps belong in hip belt pockets or the top lid.
If you plan to combine backpacking with other outdoor pursuits, a camping backpack with tent and sleeping bag bundle can simplify your first purchase. For day hikes from base camp, a mountain biking hydration pack can double as a lightweight summit pack.
Clothing and Layering: Dress for Success on the Trail
Backpacking clothing follows a simple principle: layer for versatility, not bulk. A three-layer system handles most conditions. Your base layer wicks moisture away from your skin. Your mid-layer traps heat. Your outer shell blocks wind and rain. Avoid cotton entirely, as it retains moisture and accelerates heat loss when wet.
Pack one set of hiking clothes and one set of dry camp clothes. This separation keeps your sleeping bag and tent free from sweat and dirt. Bring two to three pairs of wool or synthetic socks and rotate them daily. Foot care is critical on long treks; blisters end more backpacking trips than any other injury. Reviewing common camping injuries before departure helps you recognize and treat problems early. In colder months, consult the layering clothing system guide and consider winter camping boots for snow travel.
Clothing Checklist
- Moisture-wicking base layer top and bottom
- Insulating mid-layer (fleece or down jacket)
- Waterproof and windproof outer shell
- Hiking pants or convertible pants
- Two to three pairs of wool or synthetic socks
- Moisture-wicking underwear
- Warm hat, gloves, and neck gaiter
- Sun hat and sunglasses with UV protection
- Camp shoes or sandals for river crossings
- Rain jacket and rain pants
Food and Nutrition: Fuel for the Journey
Backpacking burns calories at a rate that surprises most beginners. A typical hiker expends 3,000 to 5,000 calories per day depending on terrain, pack weight, and pace. Your food must be lightweight, calorie-dense, and easy to prepare with minimal fuel and water.
Plan meals around dehydrated or freeze-dried options for dinner, and no-cook foods for breakfast and lunch. Oats, nut butter, trail mix, energy bars, and dried fruit require no cooking and provide steady energy. For dinner, dehydrated meals rehydrate with hot water in minutes. If you want to prepare your own meals, browse ideas for backpacking meals that balance nutrition with packability. A camping stove and oven combination or a compact portable gas burner handles most cooking needs, though many ultralight backpackers prefer a simple canister stove.
Always pack one extra day of food as emergency rations. Store all food and scented items in a bear canister or hang them properly at night. Review food storage rules for your specific region.
Water Treatment and Hydration: Stay Safe and Hydrated
Never drink untreated water from lakes, rivers, or streams on the trail. Even pristine-looking alpine water can contain Giardia, Cryptosporidium, and bacteria that cause severe gastrointestinal illness. Carry a reliable water treatment method, whether that is a squeeze filter, pump filter, gravity system, or chemical purification tablets.
Carry at least two liters of water capacity, more if your route has long dry sections. Collapsible water bladders save space when empty, while rigid bottles are easier to fill from shallow sources. Before departure, check the location and reliability of water sources along your route. A water filter technology overview can help you choose between hollow-fiber, ceramic, and UV purification systems.
Navigation and Safety: Prepare for the Unexpected
Navigation is a non-negotiable skill for backpackers. Even on well-marked trails, weather, fallen trees, or fatigue can cause you to lose your way. Carry a paper map and compass as your primary navigation tools, and use a GPS device or smartphone app as a backup. Before relying on your phone, review the GPS versus smartphone comparison to understand battery life, durability, and reliability differences. A dedicated handheld GPS device or a digital compass can be a lifesaver in remote terrain.
Safety extends beyond navigation. Carry a well-stocked first aid kit tailored to your trip length and remoteness. Know how to treat blisters, sprains, hypothermia, and heat exhaustion. For remote trips, consider a satellite communicator or a personal locator beacon. Two-way radios provide short-range communication between group members. Understanding emergency SOS signals and what to do if lost is essential preparation. In bear country, carry bear spray and know bear spray versus firearm considerations. Review wilderness first aid basics before every major trip.
Safety & Navigation Checklist
- Paper topographic map and compass
- GPS device or smartphone with offline maps
- Personal locator beacon or satellite communicator
- Headlamp with extra batteries
- Comprehensive first aid kit
- Emergency whistle and signal mirror
- Bear spray (where required) and bear canister
- Multi-tool or repair kit
- Emergency shelter or bivy sack
- Fire-starting materials in waterproof container
Cooking and Kitchen Gear: Lightweight Meals Made Easy
Backpacking kitchen gear should be minimal, durable, and easy to clean. A canister stove weighing a few ounces, a titanium pot, a spork, and a lighter cover most three-season cooking needs. For trips where you want more cooking flexibility, a camp and kitchen setup with nested cookware offers additional capacity without excessive weight.
Fuel planning matters. A small canister typically boils enough water for two people over a weekend. Cold weather, wind, and high altitude increase fuel consumption. Always carry a spare canister on longer trips. For fire-based cooking where regulations permit, review campfire safety rules and campfire regulations for your area. Never rely on a campfire as your only cooking method, as fire bans are common during dry seasons.
Hygiene and Personal Care: Staying Clean in the Backcountry
Hygiene on the trail is about disease prevention, not luxury. Pack a small hygiene kit with a toothbrush, toothpaste tablets, biodegradable soap, hand sanitizer, and a lightweight trowel for catholes. If you are backpacking in areas where catholes are not permitted, a portable self-contained toilet or wag bag may be required.
For trips where you want to rinse off, a camping shower with hot water or a simple outside shower setup provides a refreshing break without adding significant weight. Always use biodegradable soap at least 200 feet from water sources, and follow Leave No Trace guidelines for waste disposal.
Trip Planning and Logistics: Set Yourself Up for Success
Great backpacking trips are built on solid planning. Start by choosing a destination that matches your experience level and available time. Popular areas like Yosemite, Rocky Mountain National Park, and the Smoky Mountains offer world-class backpacking but require advance permits and reservations. Lesser-known areas such as the Adirondacks or BLM land often provide greater solitude with fewer restrictions.
Check whether your destination requires a reservation and understand cancellation policies before booking. For popular parks, camping reservation apps can alert you to cancellations and openings. If you are flexible on timing, review the best time to camp for your region to avoid crowds and extreme weather.
Share your itinerary with a trusted contact before departure. Include your route, expected campsites, and estimated return time. Carry a camping communication device appropriate for your trip's remoteness. If you are backpacking with a dog, review camping with dogs regulations and camping with a dog in a tent tips.
Seasonal Considerations: Adapt Your Checklist Year-Round
Your backpacking checklist changes with the seasons. Summer trips demand sun protection, insect repellent, and extra water capacity. Spring and fall trips require rain gear and insulation for unpredictable temperature swings. Winter backpacking demands a complete gear overhaul, including a four-season shelter system, warmest sleeping bag you can carry, and winter camping heaters where safe. The winter camping gear guide and how to stay warm in winter articles provide detailed seasonal guidance.
For winter overnights, a hot tent camping setup with a wood stove adds significant weight but dramatically improves comfort in freezing conditions. Learning how to set up a tent on snow and how to melt snow for water are essential winter skills. Always check avalanche safety conditions and carry appropriate rescue gear in mountainous terrain.
Final Preparation and Leave No Trace
The night before your trip, lay out every item on your checklist and verify that nothing is missing. Weigh your pack and adjust your load if necessary. Test your stove, check your headlamp batteries, and confirm that your water filter is functioning. A pre-trip shakedown hike with your loaded pack reveals discomfort points before you are miles from the trailhead.
On the trail, follow Leave No Trace principles without exception. Pack out everything you pack in, including food wrappers, toilet paper, and damaged gear. Stay on designated trails to prevent erosion. Camp on durable surfaces at least 200 feet from water sources. Respect wildlife by observing from a distance and never feeding animals. Following quiet hours and local regulations preserves the experience for everyone.
Backpacking rewards preparation. A well-planned trip with the right gear lets you focus on the scenery, the challenge, and the solitude that make wilderness travel so powerful. Use this checklist as your foundation, adjust it for your specific trip, and hit the trail with confidence.
Frequently Asked Questions
What is the most important item on a backpacking trip checklist?
The most important item is a properly fitted backpack that matches your trip duration and load. A well-designed backpack distributes weight across your hips and shoulders, reducing fatigue on long trails. After the backpack, prioritize shelter, sleep system, and water treatment, as these directly affect safety and comfort.
How much food should I pack for a backpacking trip?
Plan for approximately 1.5 to 2.5 pounds of food per person per day, depending on trip intensity and personal calorie needs. Aim for 2,500 to 4,500 calories daily. Choose calorie-dense, lightweight foods like nuts, dried fruit, oats, and dehydrated meals. Always pack one extra day of food as emergency rations.
How much water should I carry while backpacking?
Carry one liter of water per person for every two hours of hiking, adjusting for heat and exertion. On trails with reliable water sources, carry one to two liters and refill frequently using a filter or purification tablets. On dry stretches exceeding ten miles, carry three to four liters. Always verify water source availability before departure.
What is the ideal base weight for a backpacking trip?
Base weight, which excludes consumables like food and water, should ideally fall between 10 and 20 pounds for most three-season trips. Ultralight enthusiasts target under 10 pounds, while traditional backpackers often carry 20 to 30 pounds. Beginners should prioritize comfort and safety over minimizing weight until they gain experience.
Do I need a bear canister for backpacking?
Bear canisters are required in many national parks and wilderness areas, particularly in bear country. Check local regulations before your trip. Where canisters are not mandatory, hang food and scented items in a tree at least ten feet above ground and four feet from the trunk. Proper food storage protects both campers and wildlife.
Continue Planning Your Adventure: Explore more resources on camping gear stores, hiking gear stores, and camping equipment guides. For destination inspiration, browse camping destinations, best camping spots, and best camping places. New to camping? Start with first-time camping tips and what to bring on a camping trip.