How to Set Up a Tent on Snow: The Ultimate Winter Camping Guide
Master the art of pitching a tent in snowy conditions. From site selection to anchoring, learn everything you need for a warm, safe winter shelter.
Setting up a tent on snow is fundamentally different from pitching on regular ground. Snow introduces unique challenges: unstable footing, cold transfer, wind exposure, and the risk of your tent blowing away. However, with the right winter camping gear and techniques, you can create a cozy, secure shelter even in deep powder. This guide will walk you through every step, from selecting the perfect campsite to packing up without leaving a trace.
Whether you're planning a backcountry ski trip or a snowshoeing adventure, understanding how to properly set up a tent on snow is essential for safety and comfort. After reading this guide, you'll be ready to choose the right winter tents, master snow anchors, and avoid common pitfalls like condensation and cold spots.
Step-by-Step: How to Pitch a Tent in Snow
Site selection is critical in winter. Look for a flat, sheltered area away from avalanche paths, cornices, and tree wells (dangerous voids around tree trunks). Avoid depressions where cold air pools. Ideally, find a spot with natural wind protection like a ridge or forest edge, but never directly under snow-laden branches. Check the snow stability by probing with a pole or shovel. If you're in a designated area, familiarity with national park rules regarding winter camping is essential.
Do not pitch your tent directly on uneven snow. Use a snow shovel to create a flat platform slightly larger than your tent footprint. For deep snow, you may need to dig down to a firmer layer or build up a platform by compacting snow in layers. Stamp down the area with snowshoes or skis, then let it sit for 10–15 minutes to harden. This step is crucial for comfort and to prevent your camping mats from sliding around. If the slope is slight (less than 10 degrees), you can dig a "snow bench" with a flat sleeping area and a lower cooking area.
Snow reflects cold, and body heat can melt the snow beneath you, leading to a wet tent floor. Always use a dedicated winter groundsheet (closed-cell foam or a specialized vapor barrier). Many winter campers recommend a sheet of Tyvek or a lightweight tarp. This barrier prevents meltwater from seeping in and adds insulation. For best results, combine with a high R-value camping bed or insulated sleeping pad. Without this layer, your sleeping bag will compress against wet snow, drastically reducing its loft and warmth.
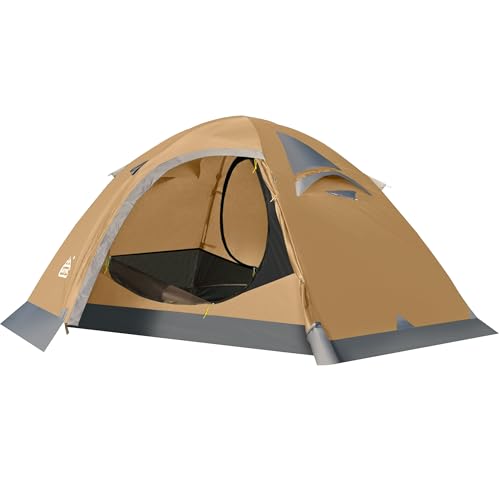
Lay out your tent body over the prepared platform. Assemble the pole structure according to manufacturer instructions. In cold temperatures, aluminum poles become more brittle, so handle them gently. If you're using a camping tent with a full-coverage fly, attach the inner tent to the poles first. Pro tip: warm up pole sections inside your jacket for a few minutes before flexing them — this reduces the risk of breakage. For freestanding tents, stake out the corners loosely before inserting poles to keep the tent from shifting in the wind.
Standard tent stakes are useless in snow. You need specialized snow anchors: deadman anchors, snow stakes (like MSR Blizzard stakes), or even stuff sacks filled with snow. To create a deadman anchor, bury a stake, a tree branch, or a filled stuff sack horizontally in a deep trench, then attach your guy line. Pack the snow tightly over the anchor. For guylines, use bright cordage to avoid tripping. Always anchor all guy points — even on a freestanding tent — as wind can pick up suddenly. If you're camping in exposed areas, consider bringing camping heaters (battery-powered) but never run fuel heaters inside a closed tent.
In snowy conditions, the rainfly is essential to keep spindrift out and reduce condensation. However, proper ventilation is critical to prevent interior moisture from freezing or dripping on you. Open the fly's vents partially, even in freezing weather. This allows water vapor from your breath to escape. If your tent lacks adequate venting, leave a small gap at the top of the door. For extreme conditions, a double-wall winter tents with a mesh inner and solid fly is ideal. Position the tent so the main door faces away from the prevailing wind.
Once your tent is securely pitched, it's time to arrange the interior. Place a closed-cell foam pad directly on the floor, then layer your insulated air pad on top. This combination prevents conductive heat loss. Keep your winter sleeping bags and extra clothing in waterproof stuff sacks. Do not bring snow-covered gear inside; brush off snow before entering. Create a small "porch" area with a pack or shovel to stage boots and wet gear. Consider bringing a lightweight trowel to dig a "vestibule floor" for gear storage. Never cook inside the tent unless using a proper mountaineering tent with a cooking vestibule and carbon monoxide alarm.
Essential Snow Camping Gear (With Real Prices)
Having the right equipment makes snow tent setup safer and more efficient. Below are recommended items with current market prices to help you budget.
| Gear Category | Recommended Type | Price Range |
|---|---|---|
| Winter Tent | 4-season dome or tunnel tent with robust poles | $450–$1,200 |
| Snow Anchors | Deadman bags (or DIY stuff sacks) + aluminum snow stakes | $20–$60 |
| Sleeping Pad Combo | Closed-cell foam (R-value 2+) + inflatable pad (R-value 4+) | $80–$250 |
| Snow Shovel | Lightweight avalanche shovel (metal blade) | $40–$100 |
| Vapor Barrier Liner | Heat-reflective emergency bivy or dedicated VB liner | $15–$50 |
| Winter Sleeping Bag | Down or synthetic rated for 0°F to -20°F | $300–$800 |
Investing in quality winter camping gear ensures your safety and comfort. While prices may seem high, a proper 4-season tent and anchor system will last for many seasons.
Top 5 Mistakes When Setting Up a Tent on Snow
- ❌ Not packing the snow platform enough: Leads to uneven, lumpy sleeping surface. Solution: Stamp the area with snowshoes for at least 5 minutes, then let it settle.
- ❌ Using regular tent stakes: They pull right out. Solution: Always use deadman anchors or wide snow-specific stakes.
- ❌ Over-tightening guylines: Can tear tent fabric or bend poles in cold. Solution: Snug but not guitar-string tight; allow for contraction.
- ❌ Ignoring condensation: Causes frozen inner tent and wet gear. Solution: Keep vents open and wipe interior with a small towel before freezing.
- ❌ Setting up too close to trees or cornices: Avalanche and falling branches risk. Solution: Maintain distance equal to at least twice the height of any overhead hazard.
If you're new to winter camping, start with a beginner camping checklist adapted for cold weather and practice your setup in a backyard before heading into the backcountry. Understanding hypothermia prevention is also vital.
Packing Up Your Snow Campsite
After a comfortable night, breaking camp in snow requires care. First, brush all snow off the tent before folding to prevent ice buildup. Remove deadman anchors by digging them out — never just yank the cord. Fill any holes or trenches you dug to restore the snow surface for wildlife and future campers. Follow Leave No Trace principles by packing out all trash, including food scraps. If you used a vapor barrier, dry it as much as possible before packing. Let the tent air out at home to prevent mildew.
Advanced Snow Camping Techniques
For those looking to push further, consider building a snow shelter building like a quinzhee or igloo for extreme protection. However, setting up a tent is faster and requires less energy. If you're camping in areas with potential avalanches, always check the local forecast and carry a beacon, probe, and shovel. avalanche safety training is non-negotiable in mountain terrain. For cooking, use a remote-canister stove with a preheating tube or a white gas stove; standard butane stoves fail in deep cold. Learn how to melt snow water efficiently to stay hydrated.
Don't forget about winter camping safety basics: inform someone of your route, carry a winter emergency kit, and understand early signs of frostbite. Use a dedicated camping lantern with lithium batteries (which perform better in cold) rather than headlamps alone for camp chores.
Ready for Your Snow Camping Adventure
Mastering how to set up a tent on snow transforms winter camping from a survival challenge into an exhilarating experience. With proper preparation, the right gear, and the step-by-step techniques outlined above, you'll sleep warm and safe even in sub-zero conditions. Start by selecting a best winter camping in US destination, practice your setup, and gradually build your skills. Remember that camping checklists are your best friend — adapt one specifically for winter. Now go forth, enjoy the silent beauty of a snowy landscape, and camp with confidence.
If you have questions or want to share your snow camping experiences, explore our camping FAQ or connect with our community. Happy winter trails!