Emergency SOS Signals: How to Call for Rescue in the Wilderness
When you're lost, injured, or facing a life‑threatening situation, knowing the right signal can mean the difference between rescue and tragedy. Learn universal distress codes used by search-and-rescue teams worldwide.
Why This Matters: Over 45,000 search-and-rescue missions occur annually in US wilderness areas alone. A properly executed SOS signal can reduce rescue time by hours or even days. Every camper, backpacker, and outdoor enthusiast must master these life‑saving techniques.
The Universal Language of Emergency
Search and rescue (SAR) teams across the globe recognize specific patterns as distress calls. Whether you use sound, light, or ground markings, the repetition of three is your key: three of anything signals emergency. Three whistle blasts, three flashlight flashes, three rock piles, or three fires in a triangle. This simple rule is recognized by pilots, ground teams, and even satellite imagery analysts.
Before diving into techniques, ensure you have basic safety gear. A well-prepared camper always carries reliable emergency communication devices alongside traditional signaling tools. Combining multiple methods dramatically increases your chances of being spotted.
Visual SOS Signals (Ground-to-Air)
Ground Markers: “HELP” or “SOS”
Create large letters using contrasting materials: rocks, logs, colored clothing, or stomped snow. Each letter should be at least 8 feet tall and 3 feet wide. The international symbol “SOS” (• • • – – – • • •) is universally understood. For open fields, use bright tarps or emergency blankets.
Signal Fires (Triangle Formation)
Build three fires in a straight line or triangle, each about 50 feet apart. Once ignited, add wet vegetation to create dense smoke (green leaves, moss, or rubber). Smoke is visible from miles away. Never leave fires unattended and always follow campfire safety rules.
Mirror / Reflective Signals
Aim sunlight toward aircraft or distant rescuers. Flash the mirror in a repeated pattern: three short flashes, three long flashes, three short flashes. Even a phone screen, watch crystal, or polished metal can work. Practice catching the “flash spot” on your hand before signaling.
Bright Clothing & Panels
Spread neon-colored clothing, tents, or sleeping bags in open areas. Create contrasting shapes (X, O, or triangle). Move the panels periodically to catch attention. Bright orange, red, or yellow stands out best against natural backgrounds.
Audio & Light Signals for Night or Low Visibility
When darkness falls or terrain blocks visual cues, sound and light become your primary tools. The international distress frequency for emergencies is 121.5 MHz (aircraft band), but most campers rely on simpler methods. For group coordination, two-way radios for camping can be invaluable, but always have a non‑electronic backup.
📢 Whistle Patterns
- Three short blasts – universal distress call
- Pause for 1 minute, then repeat
- One long blast – “Where are you?” (response: 2 blasts)
- Avoid haphazard blowing; rescuers recognize rhythmic patterns
🔦 Flashlight / Headlamp Signals
- Signal “SOS” in Morse: 3 short, 3 long, 3 short flashes
- If you see aircraft, shine light toward the cockpit (not directly in pilots’ eyes)
- Wave light in a slow sweeping motion from ground to sky
- Use high‑visibility strobe mode if available on your camping lantern
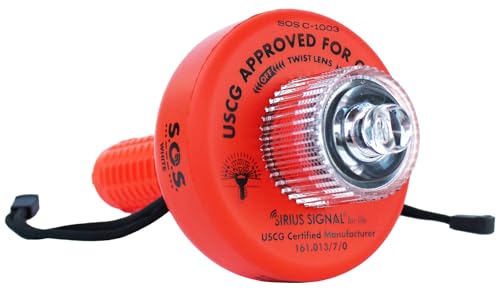
Modern SOS Technology: PLBs & Satellite Messengers
While traditional signals are essential, modern technology has revolutionized wilderness emergencies. A Personal Locator Beacon (PLB) or satellite messenger can send your exact GPS coordinates to rescue authorities with a single button press. These devices work where cell phones don’t – which is 80% of national forest land. Popular models include the Garmin inReach series and ACR ResQLink. Prices range from $250–$450 for PLBs and $300–$600+ for two-way satellite messengers (plus subscription).
Even with a PLB, you should still prepare visual signals because satellite messages can sometimes be delayed. For more tech insights, check our guide on satellite communicators for backcountry travel. Remember that emergency communication requires practice; never head into remote areas without testing your equipment.
Critical Actions While Waiting for Rescue
After deploying your SOS signals, your priority shifts to survival and making yourself easy to find. Here are the proven steps recommended by the National Park Service:
- Stay put: Moving reduces your chances of being located. Only relocate if your current spot is dangerous (flash flood area, avalanche slope).
- Conserve energy & water: Ration supplies. If you have a portable water filter, identify a reliable water source nearby.
- Build shelter: Protect yourself from weather extremes. A simple lean-to or reflective tarp can prevent hypothermia.
- Continue signaling: Refresh ground markers, recharge flashlight batteries using a solar charger for camping if available.
- Listen for aircraft: When you hear a plane or helicopter, actively signal using mirror, smoke, or bright panel.
Ground-to-Air Symbol Guide
If you hear or see an aircraft, use these internationally recognized ground symbols. Create them using rocks, logs, or by stomping snow/grass. Each symbol should be at least 12 feet in length for visibility from 1,000 feet altitude.
- ✖ "X" – Unable to proceed / need medical assistance
- ➡ "Arrow" – Direction to proceed (point toward your location)
- ✈ "N" or "F" – Need fuel or supplies (N = No, F = Yes)
- 🆘 "SOS" – General distress, highest priority
- △ Triangle – Landing possible here
- ● Circle – All is well (do not use unless safe)
For groups or family camping, it’s wise to review these signals together before your trip. Parents can teach older kids simple whistle codes. If you're camping with children, having a pre‑arranged meeting point and a basic camping first aid kit with a whistle attached can be a lifesaver. For more structured preparation, explore our emergency preparedness for camping guide.
Building Your Emergency Signal Kit
Assemble a compact signal kit that stays in your camping backpack or daypack. Essential items: high-decibel whistle (120+ dB), signal mirror with sighting hole, small LED strobe light, bright bandana or flag (orange/red), survival blanket (reflects light), and a laminated SOS instruction card. For winter camping, carry bright snow stakes and chemical light sticks. Total weight should be under 8 ounces – no excuse to leave it behind.
Many outdoor retailers sell pre‑made emergency kits ranging from $15–$50 for basic whistle+mirror combos to $200+ for PLB/rescue beacon bundles. Always practice using your gear at home: test the mirror, blow the whistle in your backyard (warn neighbors first), and memorize the SOS rhythm: di-di-dit (short), daa-daa-daa (long), di-di-dit.
Depending on your camping style – whether you prefer solo camping or family camping – the way you prepare for emergencies differs. Solo adventurers should prioritize PLBs, while families may focus on teaching children whistle signals and establishing rally points. Also consider weather: during winter camping, hypothermia can set in quickly, so signaling must be faster and more aggressive.
➡️ Ready to upgrade your safety gear?
Below you'll find our hand‑picked selection of top‑rated emergency signaling devices, PLBs, and survival tools – all available via Amazon affiliate links. Each product is chosen for reliability, ease of use, and positive search‑and‑rescue reviews. Save this page and share it with fellow campers.