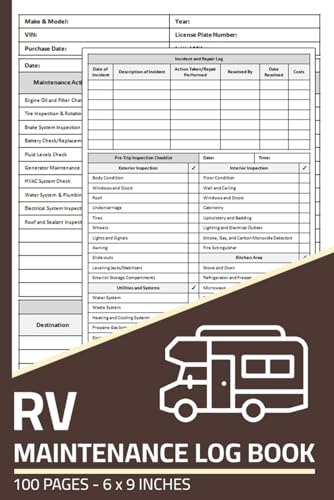
RV Inspection Checklist: The Ultimate Guide for Buyers & Owners
Whether you're buying a used motorhome or preparing your travel trailer for the road, a thorough inspection is your best defense against costly surprises. This comprehensive guide walks you through every critical system, from roof to tires, so you can make confident decisions and enjoy trouble-free adventures.
Why This Checklist Matters: An RV is a complex combination of a vehicle, a house, and a power grid. A small leak or a worn tire can quickly turn a dream trip into a nightmare. This guide is designed for both first-time buyers and seasoned owners who want a reliable, repeatable inspection process.
Exterior Inspection: The First Line of Defense
Start your inspection with a slow, methodical walk around the entire RV. The exterior is your first clue about how well the unit has been maintained. Look for any signs of impact damage, rust, or delamination (where the fiberglass walls separate from the substrate). Pay close attention to the roof, as it's the most common source of water damage.
Check all seals and caulking around windows, vents, and roof penetrations. Cracked or peeling sealant is a major red flag. While inspecting the roof, also check the condition of the RV inspection checklist for the roof itself, including the condition of the ladder and any roof-mounted accessories like air conditioners or solar panels. For those considering a towable, a towing capacity guide is essential to ensure your vehicle can handle the load.
Roof and Sealant Check
- Roof Membrane: Look for tears, punctures, or areas where the membrane is pulling away from the edges.
- Sealant: Inspect all caulking around vents, skylights, and antennas. It should be pliable and free of cracks.
- Roof Accessories: Test the air conditioner, TV antenna, and any vents for proper operation and secure mounting.
- Ladder: Ensure the ladder is securely attached and not cracked.
Tire and Undercarriage: The Foundation of Safety
The tires and undercarriage are critical for safe travel. RV tires often age out before they wear out, so checking the date code is essential. Look for uneven wear, cracks, or bulges. While you're underneath, inspect the frame for rust, the suspension components for wear, and the brake lines for leaks.
For those with a towable RV, the hitch and weight distribution system are vital. A towing capacity guide can help you understand the limits of your vehicle. If you're considering a truck camper, you'll also want to review a half-ton truck campers guide to ensure compatibility.
Tire and Undercarriage Checklist
- Tire Date Code: Check the DOT code on the sidewall. Tires older than 5-7 years should be replaced regardless of tread depth.
- Tread Depth: Use a tread depth gauge. Look for uneven wear that could indicate alignment or suspension issues.
- Suspension: Check leaf springs, shocks, and airbags for leaks or damage.
- Brakes: Inspect brake pads, rotors, and lines for wear or leaks.
- Hitch and Coupler: For towables, check the coupler, chains, and breakaway cable for wear and proper function.
Electrical Systems: Powering Your Adventure
A modern RV has two electrical systems: a 12-volt DC system for lights and pumps, and a 120-volt AC system for appliances and outlets. A thorough inspection of both is crucial. Start by testing the battery, then move to the converter, inverter, and all outlets.
If you plan to camp off-grid, you'll want to understand how to manage your power. A guide to portable power stations can be a great supplement to your RV's built-in system. Also, check all 12-volt LED strip lights for RV exterior if your unit has them, as these are often added as aftermarket upgrades.
Electrical Checklist
- Battery: Check voltage and specific gravity. Look for corrosion on terminals.
- Converter/Inverter: Test that the converter charges the battery when plugged into shore power. Test the inverter if equipped.
- Outlets and GFCI: Test all 120V outlets with a circuit tester. Press the test button on all GFCI outlets.
- 12V System: Test all interior lights, fans, and the water pump.
- Shore Power Cord: Inspect the cord for cuts or burn marks. Check the plug for signs of overheating.
Plumbing and Water Systems: No Leaks Allowed
Water damage is the number one enemy of an RV. A thorough plumbing inspection is non-negotiable. Pressurize the system and check every faucet, toilet, and shower for leaks. Also, inspect the water heater, holding tanks, and the city water connection.
For those who enjoy boondocking, a portable camping shower toilet changing room tent can be a useful backup, but your RV's built-in systems should be your primary focus. If you're looking at a camper with a bathroom, a pop-up camper with bathroom guide can provide additional insights.
Plumbing Checklist
- Fresh Water Tank: Fill and check for leaks. Sanitize if necessary.
- Water Pump: Turn on and listen for unusual noises. Check for leaks around the pump.
- Water Heater: Test on both propane and electric (if equipped). Check the anode rod.
- Faucets and Toilet: Run all faucets and flush the toilet. Check for leaks underneath.
- Holding Tanks: Fill the black and grey tanks with water and check for leaks at the valves and dump connection.
- City Water Connection: Connect a hose and check for leaks.
Propane and Appliances: The Comfort Systems
The propane system powers your stove, oven, furnace, and sometimes the refrigerator and water heater. A leak in this system is a serious safety hazard. Use a soapy water solution to check all connections for bubbles. Also, test every appliance to ensure it ignites and runs correctly.
If you're planning to camp in cold weather, a reliable furnace is a must. For extra warmth, consider a propane fire pit for outside, or review a heater for camping in a tent in the winter if you need a backup. A portable fridge can also be a great addition for extra food storage.
Propane and Appliance Checklist
- Propane Tanks: Check the date and condition of the tanks. Ensure they are securely mounted.
- Leak Test: Perform a soapy water test on all connections, including the regulator and appliance fittings.
- Stove and Oven: Light all burners and the oven. Check for a steady blue flame.
- Furnace: Run the furnace and check for proper ignition and airflow.
- Refrigerator: Test on both propane and electric. Check that it cools properly.
Interior Inspection: Comfort and Condition
The interior is where you'll spend most of your time, so a detailed inspection is important. Look for signs of water damage, such as soft spots in the floor, stained ceiling panels, or a musty smell. Check the condition of the furniture, cabinets, and flooring. Test all windows and doors for proper operation and seals.
If you're looking to upgrade your sleeping arrangements, a memory foam mattress topper can make a world of difference. For extra comfort, a portable camping rug can make the interior feel more like home.
Interior Checklist
- Flooring: Check for soft spots, delamination, or water stains.
- Ceiling and Walls: Look for water stains, sagging, or delamination.
- Cabinets and Drawers: Open and close all cabinets and drawers. Check latches and hinges.
- Windows and Doors: Open, close, and lock all windows and doors. Check seals and screens.
- Furniture: Inspect upholstery, cushions, and dinette for wear or damage.
Safety Equipment: Be Prepared for Anything
Safety should always be a top priority. Check that all safety equipment is present and in good working order. This includes smoke detectors, carbon monoxide detectors, propane detectors, and fire extinguishers. Also, check the expiration dates on these items and replace them if necessary.
For peace of mind on the road, consider carrying a personal locator beacon and a well-stocked first aid for camping kit. It's also wise to review common camping injuries so you know how to respond in an emergency.
Safety Checklist
- Smoke Detector: Test the alarm and check the expiration date.
- Carbon Monoxide Detector: Test the alarm and check the expiration date.
- Propane Detector: Test the alarm and check the expiration date.
- Fire Extinguisher: Check the pressure gauge and the date of last inspection.
- Emergency Exit: Ensure all emergency exits are accessible and functional.
Pre-Trip Check: Ready for the Road
Before every trip, a quick pre-trip check can save you from a roadside breakdown. This includes checking fluid levels, tire pressure, lights, and the hitch. It's also a good time to restock your emergency preparedness for camping kit and review your camping communication devices.
For a smooth journey, make sure you have a good camping navigation apps on your phone and a reliable two-way radio for camping for communication in areas with no cell service.
Pre-Trip Checklist
- Fluids: Check engine oil, coolant, transmission fluid, and washer fluid.
- Tire Pressure: Check and adjust tire pressure on the RV and tow vehicle.
- Lights: Test all exterior lights, including brake lights, turn signals, and running lights.
- Hitch: Ensure the hitch is properly connected and the safety chains are crossed.
- Emergency Kit: Restock your emergency kit with fresh water, non-perishable food, and first aid supplies.
Conclusion: Inspect with Confidence
An RV inspection checklist is not just for buying a used unit; it's a vital tool for every owner. By systematically checking each system, you can prevent minor issues from becoming major, expensive problems. Use this guide to make informed decisions and keep your RV in top condition for years of adventure.
Remember, a well-maintained RV is a safe and enjoyable RV. Happy camping!