Master the Art of Warmth: The Ultimate Hammock Underquilt Guide
Say goodbye to "cold butt syndrome" and extend your camping season. Discover how an underquilt transforms your hammock into a cozy, insulated sanctuary, no matter the weather.
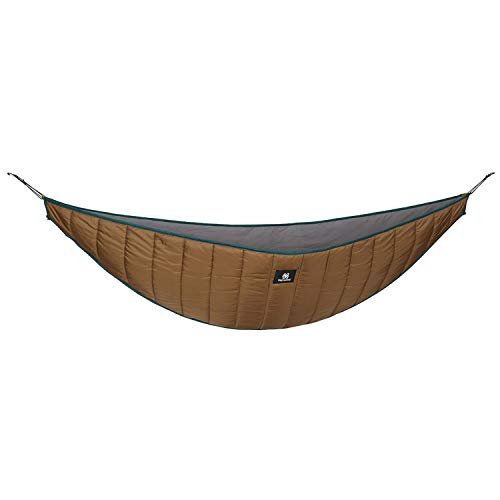
Stop Losing Heat from Below. In a hammock, your sleeping bag compresses under your body weight, offering almost no insulation from the cold air beneath you. This is where an underquilt becomes essential. It hangs underneath your hammock to provide uncompressed, consistent warmth, making it the single most important upgrade for any hammock camper. [citation:2][citation:4]
What Is a Hammock Underquilt and Why Do You Need One?
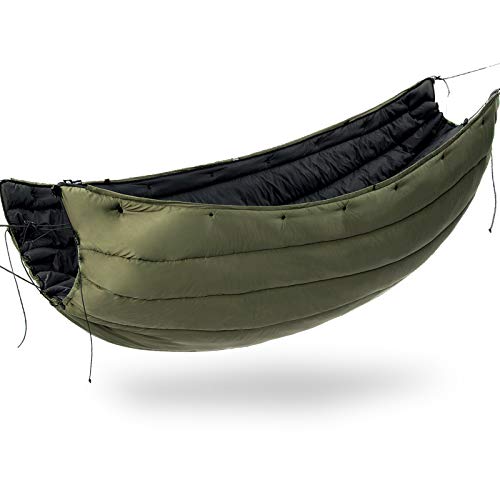
An underquilt is an insulated layer that hangs below your hammock. Unlike a sleeping pad inside the hammock, which can shift and create cold spots, an underquilt wraps around the underside, creating a warm, dead-air space that traps your body heat. [citation:7] This addresses the core problem of hammock camping: 65–70% of your body heat can escape through the bottom due to convective heat loss from the constant airflow. [citation:2]
If you're new to hammock camping, understanding the camping hammock setup is just the beginning. An underquilt is the key to a good night's sleep, especially when you're comparing tent vs hammock for comfort and warmth.
✅ Benefits of an Underquilt
- Superior Warmth: Provides consistent, uncompressed insulation.
- Unmatched Comfort: Conforms to your body and doesn't shift around like a pad.
- All-Season Use: Allows you to camp comfortably in spring, fall, and even winter.
- Better Sleep: Eliminates "cold back" or "cold butt syndrome," the #1 complaint among new hammock campers. [citation:8]
🤔 Underquilt vs. Sleeping Pad
While you can use a sleeping pad in a hammock, it is a compromise. Pads often shift, are too narrow, and can create a tippy feeling. [citation:4]
- Underquilt: Designed specifically for hammocks, stays in place, and offers superior, uncompressed warmth.
- Sleeping Pad: A multi-purpose item that works in a tent but is less comfortable and effective in a hammock.
For a detailed comparison, check out our guide on camping mats and other insulation options.
How to Choose the Perfect Underquilt
Selecting the right underquilt depends on your camping style, preferred seasons, and budget. Here are the key factors to consider.
1. Temperature Rating
Choose an underquilt rated for the coldest night you expect to face. A 20°F underquilt is the most popular "do-everything" choice for three-season camping. [citation:2] Unlike a top quilt, you are unlikely to overheat from an underquilt that is rated too warm, as you can easily vent it. [citation:3]
- Summer (40°F+): Lightweight synthetic or a simple 3/4-length quilt.
- 3-Season (20°F to 40°F): A 20°F down or synthetic quilt offers the best versatility.
- Winter (Below 20°F): A 0°F full-length down quilt is recommended for maximum warmth.
For extreme conditions, learn about winter camping gear and winter sleeping bags for a full system approach.
2. Insulation Type: Down vs. Synthetic
- Down: Lighter, more compressible, and offers the best warmth-to-weight ratio. It is more expensive and loses its insulating properties when wet. [citation:2]
- Synthetic: More affordable, insulates even when damp, and is easier to maintain. It is heavier and bulkier than down. [citation:2]
For backpacking, the weight savings of down are often worth the extra cost. For car camping or wet climates, synthetic is a reliable and budget-friendly choice.
3. Coverage: Full-Length vs. 3/4-Length
- Full-Length (75"+): Covers you from head to toe, offering the most warmth and comfort, especially below 30°F. [citation:5]
- 3/4-Length (55"-65"): Covers your core from shoulders to knees, saving weight and pack space. You'll need a small pad or your pack under your feet for insulation. [citation:2]
For ultralight backpacking, a 3/4-length underquilt is a popular choice, while full-length is recommended for winter comfort. Learn more about ultralight camping gear to balance weight and warmth.
4. Suspension System and Fit
An underquilt needs a good suspension system to stay snug against your hammock. Look for adjustable shock cords at the ends and along the sides. [citation:4] The fit is crucial: it should be close enough to prevent air gaps but not so tight that it compresses the insulation.
Many underquilts are universal, but some are designed for specific hammock models. Ensure yours is long enough and has the right width for your hammock.
How to Set Up Your Underquilt for Maximum Warmth
Even the best underquilt won't keep you warm if it's not set up correctly. Follow these expert tips for a perfect hang.
- Start Inside: Lay the underquilt inside the hammock while you attach the ends to prevent it from touching the dirty ground. [citation:4]
- Snug but Not Tight: Adjust the suspension until the underquilt is close to the bottom of the hammock. When you lie down, there should be a small gap. If it's too tight, it will compress the insulation; too loose, and cold air will flow through.
- Seal the Ends: Tighten the end cinches (drawcords) to prevent airflow from entering the ends of the quilt, creating a warm, trapped pocket of air.
- Secure the Sides: Use any side attachments or shock cords to pull the quilt up around the hammock's edges, eliminating gaps where wind can chill you. [citation:7]
- Venting for Warm Weather: You can loosen the suspension or open the ends to allow air to circulate, preventing overheating on milder nights. [citation:1]
Proper setup is also essential for setting up in the rain or on the snow, where staying dry is paramount.
For a deeper dive into maintaining your gear, consider reading our guide on tent care, as many principles apply to quilts as well.