Ultralight Backpacking Cooking Gear
Build a minimalist backcountry kitchen that keeps your pack light and your meals satisfying. Expert guide to stoves, cookware, and fuel systems for thru-hikers and weekend warriors.
Explore Stove SystemsThe Ultralight Philosophy: Every gram in your pack matters on a long trail. Your cooking system is one of the easiest places to shave weight without sacrificing hot meals. This guide will help you understand the trade-offs between weight, fuel efficiency, cooking versatility, and reliability so you can build a kit that matches your hiking style.
Why Your Cooking System Deserves Scrutiny
For most backpackers, the cooking system occupies a disproportionate amount of pack weight relative to how often it is used. A traditional camp kitchen — multi-piece cookware, a heavy stove, and a large fuel canister — can easily add three to five pounds to your base weight. On a multi-day trek, that weight translates directly into fatigue, slower pace, and reduced enjoyment.
An ultralight cooking setup, by contrast, can weigh under a pound while still boiling water reliably and preparing satisfying meals. The key is understanding that ultralight does not mean fragile or impractical. It means choosing components that are purpose-built for the specific way you cook on trail. If you primarily boil water for dehydrated meals, your needs are very different from someone who simmers sauces or bakes fresh bread. For those just starting to refine their kit, our guide on essential equipment for backpacking provides a solid foundation before diving into gram-counting.
Weight savings in the kitchen also compound. A lighter stove may allow you to carry a smaller pot, which in turn reduces fuel needs, which lets you carry a smaller fuel container. These interdependent choices are what separate a well-considered ultralight kit from a random collection of light objects.
Stove Types: Finding Your Ideal Heat Source
The stove is the heart of your cooking system. There is no single best stove — only the best stove for your fuel availability, cooking style, and climate. Below is a breakdown of the most common ultralight options, along with their strengths and weaknesses.
Canister Stoves
Canister stoves are the most popular choice for ultralight backpackers in North America and Europe. They screw onto a pressurized isobutane-propane canister and offer instant, controllable heat with no priming or pumping. Modern canister stoves from premium brands weigh as little as two to three ounces and boil a liter of water in under three minutes. They excel in three-season conditions and are incredibly convenient.
The main drawbacks are fuel availability in remote regions, reduced performance in freezing temperatures, and the fact that you cannot easily tell how much fuel remains in a canister. For winter trips, you may need a stove with a pressure regulator or a liquid-feed design, which adds weight and complexity. If you are planning cold-weather adventures, our cold weather camping gear checklist covers the stove and fuel considerations you will need to address.
Alcohol Stoves
Alcohol stoves are the darling of the ultralight community. A simple homemade or commercial alcohol stove can weigh less than an ounce. They burn denatured alcohol or methanol, which is widely available at hardware stores and gas stations. There are no moving parts to fail, no pressurized canisters to worry about, and they are nearly silent.
The trade-offs are real: alcohol stoves are slower to boil water, offer no flame adjustment, and are sensitive to wind. They also have lower energy density than canister fuel, meaning you need to carry more fuel by weight for the same amount of cooking. For solo hikers doing mostly freezer-bag meals, an alcohol stove is a compelling option. For groups or longer trips, the fuel weight penalty can erase the stove weight savings.
Wood-Burning Stoves
Wood-burning stoves, sometimes called rocket stoves, use twigs and small biomass as fuel. They are endlessly renewable and eliminate the need to carry fuel entirely. A well-designed wood stove can boil water surprisingly quickly once you master the technique of feeding it.
The downsides are significant for ultralight travel: wood stoves are generally heavier than canister or alcohol stoves, they require dry fuel (which may not be available in wet conditions or above treeline), they leave soot on your pot, and they are banned in many areas during fire restrictions. They are best suited for car camping or emergency preparedness rather than serious ultralight backpacking. Our article on campfire regulations explains the legal restrictions you may encounter.
Solid Fuel Tablets
Solid fuel tablets, such as Esbit, are the simplest possible stove system. A tiny folding stove weighs almost nothing, and the fuel tabs are stable and easy to transport. They are excellent for emergency kits and short trips where weight is absolutely critical.
However, solid fuel is slow, leaves a residue on cookware, and produces a distinctive odor. The fuel tabs can also be difficult to light in wind. They are not a practical primary stove for most backpackers, but they make a fine backup.
Quick Comparison: Stove Types at a Glance
| Stove Type | Weight Tier | Boil Speed | Fuel Availability | Best For |
|---|---|---|---|---|
| Canister | Mid-range to premium | Fast | Good in developed areas | Three-season backpacking, groups |
| Alcohol | Entry-level to mid-range | Slow | Excellent (hardware stores) | Solo hikers, freezer-bag meals |
| Wood | Mid-range to heavy | Moderate | Unlimited (if dry wood) | Car camping, survival kits |
| Solid Fuel | Entry-level | Very slow | Good (outdoor stores) | Emergency backup |
Cookware: Titanium, Aluminum, and the Case for Minimalism
Your pot or mug is the second pillar of the ultralight kitchen. The material and design of your cookware affect weight, heat distribution, durability, and how easily your food burns. The three main materials are titanium, hard-anodized aluminum, and stainless steel.
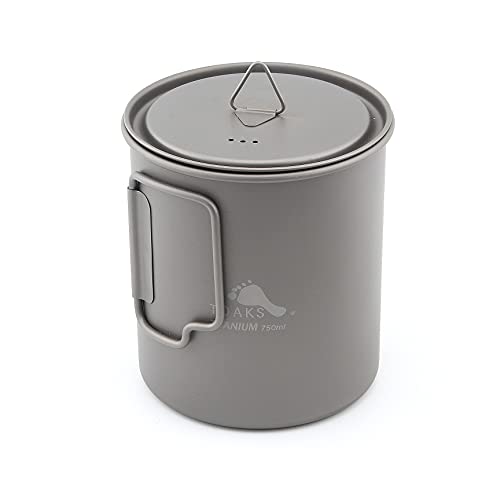
Titanium is the ultralight gold standard. It is incredibly strong for its weight, resistant to corrosion, and does not impart any metallic taste to food. The downside is that titanium conducts heat poorly, creating hot spots that can burn food if you are not careful. Titanium pots are best for boiling water and simple rehydrating. They are typically found in premium and high-end price tiers.
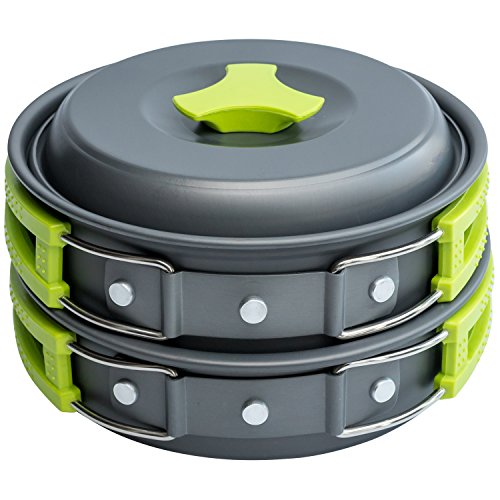
Hard-anodized aluminum is the practical middle ground. It conducts heat much more evenly than titanium, weighs only slightly more, and is significantly less expensive. Many mid-range and top-tier cookware sets use hard-anodized aluminum. The main concern is that the non-stick coating can scratch over time, and bare aluminum can react with acidic foods.
Stainless steel is durable and inexpensive but heavy. It is rarely the first choice for ultralight backpacking, though small stainless steel cups and pots do appear in budget-friendly kits.
For most ultralight backpackers, a single titanium or hard-anodized aluminum pot in the 550ml to 750ml range is sufficient for solo use. Couples or groups may carry a 1.3L to 1.5L pot. If you are cooking for two, our guide to backpacking dehydrated meal recipes offers meal ideas that work well with a minimalist pot setup.
Pots, Pans, and Multi-Function Pieces
The classic ultralight pot is a simple titanium mug or pot with a lid and folding handles. Some hikers opt for a ultralight rectangular sleeping bag style of thinking: one piece that does many jobs. In the kitchen, that might mean a pot that doubles as a bowl, or a lid that serves as a frying pan.
If you plan to actually fry or simmer rather than just boil, a lightweight non-stick pan becomes worthwhile. These are typically in the mid-range weight and price tier. For pure boil-in-bag or freezer-bag cooking, a simple pot with a lid is all you need. The ultralight backpacking cooking gear you choose should match your actual cooking habits, not an imagined version of them.
Fuel and Efficiency: The Hidden Weight Factor
New backpackers often obsess over stove weight while ignoring fuel weight. This is a mistake. Fuel is consumable weight, and on a long trip, it can easily exceed the weight of the stove itself. Understanding your fuel consumption is essential for planning.
Canister stoves typically consume about 0.5 to 0.7 ounces of fuel per liter of water boiled, depending on conditions. Alcohol stoves consume roughly 0.8 to 1.2 ounces of alcohol per liter. These numbers vary with wind, altitude, and water temperature. A good rule of thumb is to test your setup at home before relying on estimates for a long trip.
Wind is the single biggest enemy of fuel efficiency. A simple aluminum foil windscreen can cut fuel consumption dramatically. Many ultralight stoves come with integrated windscreens, or you can make your own. Just be careful not to enclose a canister stove too tightly, as overheating the canister can be dangerous.
For trips where you will be melting snow for water, fuel consumption skyrockets. Melting snow is one of the most fuel-intensive activities in backpacking. Our article on how to melt snow for water covers techniques to maximize efficiency in winter conditions.
Building Your Ultralight Kitchen: A Step-by-Step Approach
Rather than buying a pre-assembled kit, the best approach is to build your cooking system component by component, testing each piece on short trips before committing to a long hike.
Step 1: Define Your Cooking Style
Ask yourself honestly: will you boil water and rehydrate meals, or will you actually cook? If you are a freezer-bag backpacker, your kit can be extraordinarily minimal. If you like to simmer rice, sauté vegetables, or bake, you need a more capable stove and a wider pot. There is no wrong answer, but being honest with yourself prevents buying gear you will not use.
Step 2: Choose Your Fuel Type
Consider where you will be hiking. Canister fuel is widely available in outdoor stores across North America and Europe, but it is harder to find in remote parts of South America, Asia, and Africa. Alcohol is available almost everywhere. If you are hiking internationally, an alcohol stove may be the more reliable choice. If you are doing a weekend trip in a national park, a canister stove is hard to beat for convenience.
Step 3: Select Your Cookware
Match your pot size to your group size and cooking style. A solo hiker boiling water for one meal at a time needs about 550ml to 750ml. A couple sharing meals needs about 1.3L. A group of three or four may need 1.5L to 2L. Remember that a wider pot is more fuel-efficient because it exposes more surface area to the flame, but it takes up more pack space. A taller, narrower pot packs better but is less efficient.
Step 4: Add Accessories Wisely
The classic ultralight accessories are a spork, a small lighter or fire starter, a pot scrubber, and a stuff sack for organization. Some hikers carry a small cutting board or a lightweight knife. Others carry a camping backpack with water bladder that doubles as a water carrier for cooking. Each accessory adds weight and volume, so add them one at a time and ask whether each item truly earns its place.
Step 5: Test and Refine
Take your kit on an overnight trip and see how it performs. Did you run out of fuel? Did your pot scorch your food? Did you wish you had a bigger mug? These small experiments reveal more than any spec sheet. Over time, you will refine your kit until it is perfectly tuned to your needs. For more general gear advice, our guide on camping essentials for first-timers helps you avoid common beginner mistakes.
Maintenance and Care for Long-Term Reliability
An ultralight cooking system is only as good as its condition. A few simple habits will keep your gear working reliably for years.
Clean your stove regularly. Canister stoves can accumulate debris in the burner ports, which reduces performance. A soft brush or a blast of compressed air can clear them. Alcohol stoves should be rinsed and dried after each trip to prevent corrosion. Wood stoves need their burn chamber scraped clean of ash and creosote.
Inspect your O-rings and seals on canister stoves before every trip. A worn O-ring can cause a dangerous fuel leak. Replace them at the first sign of cracking or stiffness. Store your stove and fuel in a cool, dry place away from direct sunlight.
For cookware, avoid using metal utensils on non-stick surfaces. A small silicone or wooden spatula weighs almost nothing and prevents scratches that shorten the life of your pot. If you use titanium, remember that it is tough but can dent if dropped on rock. A stuff sack provides protection in your pack.
Finally, practice Leave No Trace principles in the kitchen. Pack out all food scraps, do not burn trash in your stove or campfire, and follow local regulations about food storage. Our article on Leave No Trace principles explains the seven principles in detail.
Common Mistakes in Ultralight Cooking
Even experienced backpackers make mistakes when refining their cooking systems. Here are the most common pitfalls and how to avoid them.
Carrying too much cookware. A pot, a pan, a bowl, and a mug is overkill for most trips. A single pot and a spork can handle almost everything. If you need a bowl, use your pot. If you need a mug, use your pot. Ultralight is about multi-functionality.
Ignoring wind protection. A stove that works beautifully in your backyard may struggle in a windy mountain pass. A simple windscreen made from heavy-duty aluminum foil weighs next to nothing and can cut fuel consumption by a third or more.
Underestimating fuel needs. Running out of fuel on a remote trail is a miserable experience. Always carry a small buffer of extra fuel, especially on trips where you plan to melt snow or cook elaborate meals. For emergency situations, our guide on emergency preparedness camping covers how to plan for the unexpected.
Buying gear before testing. The ultralight community is full of strong opinions, but the best gear is the gear that works for you. Borrow or rent before you buy, and test your kit on short trips before committing to a long-distance hike.
Frequently Asked Questions
What is the lightest possible backpacking cooking setup?
The lightest practical setup is an alcohol stove made from a cat food can, a titanium mug, and a homemade aluminum foil windscreen. This can weigh under two ounces total, excluding fuel. However, it is slow and not suitable for all conditions. A more versatile ultralight setup is a canister stove paired with a titanium pot, which typically weighs around six to eight ounces total.
Do I need a stove at all for ultralight backpacking?
Some ultralight hikers go stoveless, eating only cold-soaked meals and snacks. This eliminates stove and fuel weight entirely. However, it limits your meal options and can be psychologically difficult on cold, wet trips. Most backpackers find that a small stove is worth its weight for the morale boost of a hot meal and hot drink. If you are interested in cold-soaking, our guide to backpacking food from the grocery store offers ideas for no-cook meals.
How much fuel should I carry for a multi-day trip?
A good starting estimate is one ounce of canister fuel per person per day for boiling water. If you are melting snow or cooking elaborate meals, double that. For alcohol stoves, plan on about 1.5 to 2 ounces per person per day. Always carry a little extra as a buffer, especially in cold or windy conditions where efficiency drops.
Is titanium cookware worth the higher price tier?
Titanium offers the best strength-to-weight ratio of any cookware material, and it will not impart flavors to your food. For backpackers who count every gram, titanium is often worth the investment. However, hard-anodized aluminum performs nearly as well for a lower price and conducts heat more evenly. If you are on a tighter budget, aluminum is a perfectly reasonable choice.
Can I use a canister stove in cold weather?
Standard canister stoves lose pressure in freezing temperatures, which reduces performance. You can improve cold-weather performance by keeping the canister warm in your sleeping bag overnight, using a stove with a pressure regulator, or choosing a liquid-feed stove that inverts the canister. For serious winter camping, a white gas stove is the most reliable option. Our article on winter camping gear covers cold-weather cooking in more detail.
What is the best pot size for solo backpacking?
For solo backpacking, a 550ml to 750ml pot is ideal. It is large enough to boil water for a dehydrated meal and a hot drink, but small enough to pack easily and keep weight down. If you frequently cook for two or want to boil water for two meals at once, a 1.3L pot is a better choice.
Ready to Lighten Your Load?
Browse our recommended ultralight backpacking cooking gear below. Each product is selected for its balance of weight, durability, and real-world performance on the trail.
See Recommended Gear