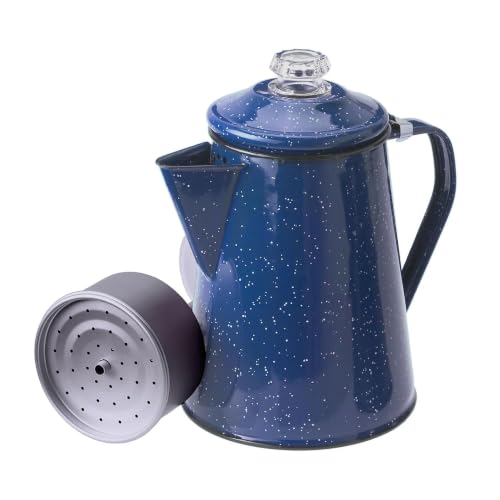
Camping Coffee Pot: Brew the Perfect Cup Outdoors
Everything you need to know about choosing and using a camping coffee pot for a delicious, comforting cup of coffee in the great outdoors.
For many campers, a hot cup of coffee is an essential part of the morning routine. The aroma of freshly brewed coffee drifting through the campsite can transform a good camping trip into a great one. A reliable camping coffee pot is the key to making this happen. Unlike a standard kitchen coffee maker, a camp coffee pot is designed to be durable, portable, and easy to use with various heat sources, from a campfire to a portable stove.
Choosing the right pot depends on your brewing style, the size of your group, and your preferred method of packing. Whether you are a minimalist backpacker or a car camper who enjoys a bit of luxury, there is a perfect solution for you. This guide will walk you through the most common types, helping you brew a barista-quality cup wherever your adventures take you.
Types of Camping Coffee Pots
Percolator
The traditional choice. A percolator cycles boiling water over coffee grounds, creating a strong, robust brew. It's simple, requires no filters, and works on any heat source. Best for groups and those who enjoy a bold flavor.
Pour-Over
Ideal for backpackers and solo campers. A pour-over cone is lightweight and packs flat. It uses paper filters for a clean, bright cup. Requires a steady hand and a separate kettle or pot for boiling water, but offers excellent control.
French Press
A favorite for coffee purists. A camp-friendly French press (often made of stainless steel or durable plastic) offers full immersion brewing, resulting in a rich, full-bodied cup. Easy to use, but requires a coarse grind and careful pressing.
Moka Pot / Espresso
For a strong, espresso-like coffee, a Moka pot is a great choice. It uses steam pressure to brew coffee. It's fast, compact, and perfect for making a quick, potent cup to kickstart your morning. Works best on a gas stove.
Key Features to Consider When Buying
- Material: Stainless steel is the most durable and easy to clean, making it ideal for rugged use. Aluminum is lighter but can dent and may impart a metallic taste if not seasoned properly. Hard-anodized aluminum is a great compromise. For pour-over cones, silicone or BPA-free plastic is a lightweight option.
- Capacity: Match the size to your typical camping group. A 1-2 cup size is perfect for solo travelers, while a 6-12 cup percolator is suitable for families or larger groups. Remember, you can always brew less, but not more.
- Heat Source Compatibility: Ensure the pot is compatible with your camping stove, be it a butane, propane, or multi-fuel stove. If you plan to use it over a campfire, a sturdy stainless steel percolator is your best bet. Some lightweight pots are not designed for open flames.
- Packing and Portability: For backpackers, weight and packability are critical. Look for nesting options or collapsible designs. For car campers, a slightly heavier, more robust pot is often preferred for its ease of use. If you are packing your gear, a camping duffel bag can help keep everything organized.
- Ease of Cleaning: A wide mouth and few internal parts make cleaning at a campsite much easier. Percolators have multiple parts, while pour-over cones are generally the simplest to rinse.
How to Brew the Perfect Cup at the Campsite
Brewing great coffee outdoors is a simple process. For a percolator, start with cold, fresh water and coarse-ground coffee. The general rule is one tablespoon of coffee per cup of water. Assemble the percolator, ensuring the basket is seated correctly. Place it on your heat source and wait for the percolating action to begin. Once it starts, let it perk gently for about 7-10 minutes, depending on the desired strength. Avoid a rolling boil, which can make the coffee bitter and grounds can splash into the brew.
For a pour-over, heat your water in a kettle or a separate pot like a camping kettle. Place a filter in the cone, add your medium-fine ground coffee, and slowly pour hot water in a circular motion, starting from the center. This blooming process allows the coffee to release gases and results in a more flavorful cup. If you are using a French press, add coarse grounds and hot water, stir, and let it steep for 4 minutes before pressing. Always use a good camping coffee mug to keep your brew warm.
Ready to elevate your camp kitchen? A dedicated coffee pot is just one part of a great setup. Explore our guide to the best camping stoves to ensure you have a reliable heat source for all your cooking and brewing needs.
Frequently Asked Questions
Can I use a regular coffee pot on a campfire?
Not all coffee pots are designed for open flames. Glass or thin metal pots can crack or warp. A stainless steel percolator or a pot specifically designed for fire use is your safest bet. Always check the manufacturer's guidelines before placing any pot on a campfire.
What is the best coffee grind for a percolator?
A coarse grind is best for a percolator. A fine grind can clog the basket's holes, leading to a bitter taste and a difficult cleanup. The goal is to allow hot water to circulate through the grounds without turning them into sludge.
How do I clean a camping coffee pot?
After use, rinse all parts with hot water. For a deeper clean, use a mild soap and a bottle brush to scrub the inside. Avoid harsh abrasives that can damage the finish. For stainless steel pots, a paste of baking soda and water can help remove coffee stains and odors.
Is a French press good for camping?
Yes, if you choose a durable model. Look for a stainless steel or impact-resistant plastic French press. They are easy to use and produce a rich cup, but you need to be careful with the glass versions, which are prone to breaking during transport. Consider packing it in a protective camping backpack or a dedicated case.