Setting Up a Tent in the Snow: The Ultimate Winter Camping Guide
Transform a frozen landscape into a secure, warm campsite. Master snow-specific pitching techniques, essential gear, and pro-level cold-weather survival tips.
VIEW STEP-BY-STEP GUIDEKey Takeaway: Pitching a tent in snow requires abandoning standard tent stakes. You must learn to use deadman anchors, build protective snow walls, and compact a solid platform to prevent waking up in a frozen trough.
Why Standard Tent Setup Fails in Winter
Setting up a tent on snow is fundamentally different from pitching on soil or grass. Regular tent stakes offer zero holding power in powder. The warmth from your body can melt the snow beneath you, creating an uncomfortable, icy puddle by morning. Furthermore, exposed ridges leave you vulnerable to freezing wind gusts. Before diving into the specifics, it's crucial to understand your winter camping environment. The key is to think like a mountaineer: insulate, anchor securely, and block the wind. A successful setup ensures that your winter tent becomes a true refuge rather than a frozen coffin.
How to Pitch a Tent on Snow: 5 Crucial Steps
-
Step 1: Select and Prepare the Site
Avoid areas with overhead avalanche risk or cornices. Look for a sheltered spot, ideally behind a natural windbreak like a tree line or large rock. Stomp down the snow using snowshoes or skis to create a compact, flat platform. Don't skip this step—walking around the site for 10-15 minutes allows the snow to sinter (harden). This prevents you from sinking into the snow overnight and provides a solid base for your camping mats. If you are in a deep powder zone, digging down to create a "tent pit" can offer excellent wind protection.
-
Step 2: Master the Deadman Anchor
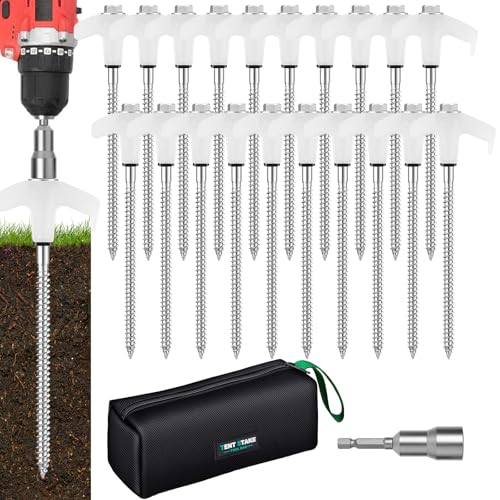
Standard stakes are useless. You need to create "deadman" anchors. You can use purpose-built camping items or improvise with sticks, skis, or stuff sacks filled with snow. Dig a horizontal trench perpendicular to the pull of the tent guylines, bury the anchor, and pack the trench tightly with snow. Let it freeze in place for a few minutes before applying full tension. This technique is essential for securing your camping tent in high winds.
-
Step 3: Build a Snow Wall (Wind Break)
If no natural shelter exists, build a snow wall upwind of your tent. Pile snow into a curved barrier that stands at least 3-4 feet high. This deflects wind over your tent rather than through it. A solid wall can increase the interior temperature by 10-15°F and prevents wind-blown spindrift from burying your entrance. This is a standard practice in primitive camping above the treeline.
-
Step 4: Trench the Vestibule and Ventilate
Dig a deep cold sink in your vestibule area. Since cold air settles, this trench allows the frigid air to pool lower than the sleeping area, keeping your main compartment warmer. Crucially, ensure your tent’s ventilation ports are open. It seems counterintuitive, but sealing the tent causes condensation from your breath to freeze on the inner walls, turning the interior into a frosty nightmare. Proper winter warmth relies on managing moisture, not just trapping heat.
-
Step 5: Anchor Guylines with Tension
Snow shifts, and guylines can slacken. Use self-tensioning guyline systems if available, or regularly check the tension. Flapping fabric not only makes noise but also degrades the waterproof coating and saps body heat. A tight pitch sheds snow efficiently and is a hallmark of proper winter camping safety.
Essential Gear for Snow Setup
Using specialized equipment removes the guesswork from a snow pitch. Here is the critical gear required to secure your shelter in a frozen environment.
| Gear Item | Purpose in Snow | Estimated Cost |
|---|---|---|
| 4-Season Winter Tent | Stronger poles to shed snow loads; minimal mesh to prevent spindrift entry. | $400+ |
| Snow/Sand Stakes & Deadman Anchors | Wide surface area to grip packed snow; essential for guylines. | $15–$40 |
| Closed-Cell Foam Pad | Uncompromising vapor barrier between the snow and your inflatable sleeping mat. | $40–$120 |
| Snow Shovel | Non-negotiable for platform compaction, trenching, and wall building. | $30–$80 |
| High-Quality Sleeping Bag | Must be rated below 0°F to compensate for conductive heat loss to the ground. | $250–$700 |
Experienced snow campers often line their sleeping bag with a lightweight vapor barrier liner (VBL). This stops body moisture from entering the insulation of your winter sleeping bag, where it would otherwise freeze over a multi-day trip, reducing loft and warmth significantly.
Avoiding Common Snow Camping Mistakes
Even experienced three-season campers make critical errors when transitioning to snow. Don't cook inside a sealed tent—carbon monoxide is a silent killer. Always use a camping stove in a well-ventilated vestibule or outside. Also, avoid the "cotton trap"; wet cotton kills insulation. Stick to a strict winter layering system of synthetics and merino wool. Finally, never underestimate the sun. The reflective glare off the snow can cause severe sunburn under your chin and inside your nostrils, so pack high-SPF sunscreen.
For those looking to combine warmth with a heavy canvas shelter, mastering the technique of setting up a wall tent with logs can turn a winter basecamp into a luxurious cabin. Alternatively, if you are stuck in a transitional season storm, understanding how to set up a tent in the rain will keep your interior dry before the precipitation turns to flurries.