
Ultimate Bikepacking Guide: Gear, Bags & Routes
Everything you need to know to start bikepacking: from choosing the right bike and bags to packing essentials and planning your first multi-day adventure.
What is Bikepacking? Bikepacking combines cycling with camping, allowing you to explore remote trails and backroads with lightweight gear mounted directly on your bike. Unlike traditional bike touring with panniers, bikepacking uses frame bags, seat packs, and handlebar rolls for a more agile and off-road-capable setup.
What Is Bikepacking?
Bikepacking is an adventure on two wheels that merges the freedom of cycling with the spirit of camping. It's about traveling light, self-supported, and often on unpaved roads, gravel paths, or singletrack trails. Unlike traditional touring, where you might carry bulky panniers on a heavy bike, bikepacking gear is streamlined and designed to keep your bike nimble and responsive.
Whether you're planning a weekend getaway or a month-long expedition, bikepacking offers a unique way to connect with nature. It's accessible to beginners and experienced cyclists alike, with routes ranging from gentle rail-trails to rugged mountain passes. If you're new to bike camping, consider starting with a shorter trip to test your setup and build confidence.
Essential Bikepacking Gear
Choosing the right gear is crucial for a successful bikepacking trip. Your setup should balance weight, durability, and functionality. Here's a breakdown of the key components you'll need.
🚲 The Right Bike
Any bike can be used for bikepacking, but gravel bikes, mountain bikes, and touring bikes are the most popular choices. Look for a bike with:
- Mounting points for racks and bags
- Wide tire clearance (40mm+) for comfort on rough terrain
- Reliable gearing for climbing with load
- Disc brakes for consistent stopping power in all conditions
For rugged adventures, a mountain bike or a dedicated gravel bike is ideal. If you're planning a mixed-terrain trip, a versatile touring bike can also work well.
👜 Bikepacking Bags
Instead of traditional panniers, bikepackers use a combination of bags that attach directly to the frame:
- Frame Bag: Fits in the main triangle, perfect for heavy items like tools and food.
- Seat Pack: Mounts under the saddle, ideal for lightweight clothing and sleeping bag.
- Handlebar Roll: Attaches to the front, great for bulky but light items like a tent or sleeping pad.
- Top Tube Bag: Convenient for snacks, phone, and map.
Invest in waterproof or water-resistant bags to protect your gear from rain and splashes.
⛺ Camping Gear
Your camping setup should be compact and lightweight. Key items include:
- Ultralight Tent or Bivy: Choose a shelter that packs small. A backpacking tent is a great option.
- Sleeping Bag: A down or synthetic bag rated for the season. Check our sleeping bag temperature guide for help.
- Sleeping Pad: Essential for insulation and comfort.
- Camp Stove: Compact systems like canister stoves or alcohol burners are popular.
Remember, every ounce counts. Look for ultralight options without sacrificing durability.
Packing, Nutrition & Hydration
Smart packing and proper nutrition are key to enjoying your bikepacking adventure. Here's what you need to know.
Start by laying out all your gear and prioritizing items. The heaviest items should go in the frame bag (low and centered), while lighter, bulky items go in the handlebar roll or seat pack. Always pack a rain jacket and extra layers within easy reach.
For nutrition, focus on high-energy, non-perishable foods. Oatmeal, nuts, dried fruit, energy bars, and instant noodles are staples. Plan your water sources in advance, and carry a water filter or purification tablets for backcountry trips. A hydration bladder or large water bottles mounted on your frame are essential for long stretches without resupply.
Planning Your First Bikepacking Route
Choosing the right route can make or break your bikepacking experience. Start with something manageable and gradually increase difficulty. Here are some tips:
- Research: Use apps like Komoot or Ride with GPS to find popular bikepacking routes. Look for routes with GPX tracks and recent reviews.
- Distance: For beginners, plan 30-50 miles per day. Include rest days if you're going for longer.
- Terrain: Start with gravel roads or rail-trails before tackling technical singletrack.
- Campsites: Check for designated camping spots, or plan for wild camping where permitted. Always follow Leave No Trace principles.
- Resupply: Plan stops for food and water. In remote areas, carry extra supplies.
Some classic beginner-friendly routes include the GAP Trail (Pennsylvania), the Katy Trail (Missouri), or the Oregon Coast. For a more adventurous challenge, consider the Colorado Trail or the Arizona Trail.
Safety & Preparation
Safety should always be your top priority. Before you head out:
- Check your bike: Ensure tires, brakes, and drivetrain are in good condition. Pack a multi-tool, spare tubes, and a pump.
- Share your plan: Tell someone your route and expected return time.
- Weather: Check the forecast and pack accordingly. Be prepared for sudden changes.
- First Aid: Carry a compact first aid kit and know how to use it.
- Communication: In remote areas, consider a satellite communicator or emergency beacon.
Also, familiarize yourself with campfire safety if you plan to cook over a fire, and always practice proper food storage to avoid attracting wildlife.
Bikepacking vs. Traditional Touring
While both involve cycling and camping, there are key differences. Traditional touring usually involves a heavier bike with front and rear panniers, suited for paved roads and longer, self-contained trips. Bikepacking, on the other hand, favors off-road terrain, lighter loads, and a more agile bike setup. Bikepacking bags are designed to keep weight low and centered, improving handling on technical trails.
Choosing between the two depends on your preferred terrain and travel style. If you're planning to stick to paved routes, a touring bike might be more comfortable. But if you're drawn to gravel roads and forest trails, bikepacking is the way to go. Either way, both offer incredible opportunities for adventure and exploration.
Where to Camp
Finding a good campsite is essential. Here are your options:
- Designated Campgrounds: Provide facilities like water and restrooms. Check out campgrounds near you or campgrounds with showers for added comfort.
- Wild Camping (Dispersed): Allowed on many public lands. Learn about dispersed camping and boondocking for more freedom.
- Stealth Camping: Camping out of sight in remote areas. Always check local regulations first.
- Backcountry Sites: Often found in national parks and forests, these require hiking or biking in. Check state park camping options.
Be sure to Leave No Trace and respect the environment wherever you stay.
Final Tips & Essential Checklist
Before you roll out, review this quick checklist to ensure you haven't missed anything:
- ✓ Bike in good condition
- ✓ Repair kit & spare tubes
- ✓ Frame, seat, and handlebar bags
- ✓ Tent or bivy
- ✓ Sleeping bag & pad
- ✓ Stove, fuel, and cookware
- ✓ Food and water (plus filter)
- ✓ Navigation (GPS, map, compass)
- ✓ First aid kit
- ✓ Headlamp or bike lights
- ✓ Layers for changing weather
- ✓ Phone and power bank
Remember, the best bikepacking trip is one where you're prepared, flexible, and ready to enjoy the journey. Start small, learn from each trip, and soon you'll be exploring remote trails and creating unforgettable memories. For more inspiration, explore our camping destinations and camping styles guides.
Top Bikepacking Gear Picks
⚠️ AFFILIATE DISCLOSURE: This website contains affiliate links. As an Amazon Associate, we earn from qualifying purchases. If you make a purchase through these links, we may receive a small commission at no additional cost to you. Read our full affiliate policy.

Rhinowalk Waterproof Bike Saddle Bag 13L - Under Seat Storage for Mountain Road Biking and Commuting Trips

Rhinowalk Anti Sway Bikepacking Saddle Bag Stabilizer Mount with 2 Bottle Cage Mounting Holes

Blackburn Outpost Cargo Water Bottle Cage (Black, One Size)
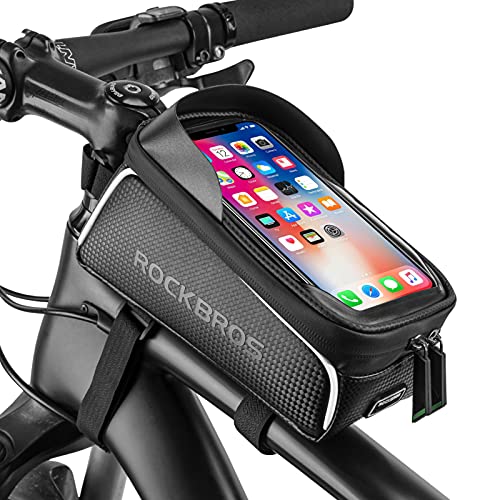
ROCKBROS Bike/Bicycle Phone Front Frame Bag, Waterproof, Tube Cycling Pouch

Bicycle Repair Kit with Pump, Tire Patch and Tool Set for All Adult Bikes

Bikepacking Illustrated - Getting started with bikepacking
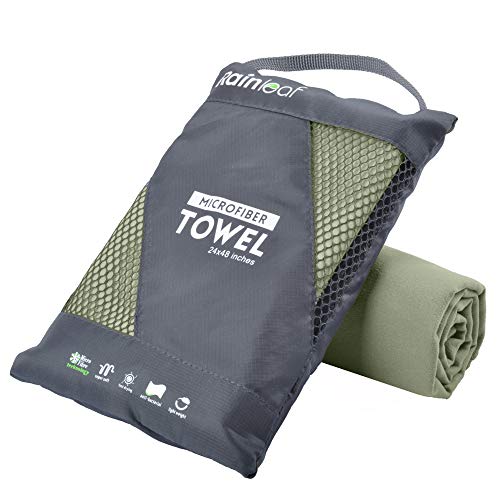
Rainleaf Microfiber Towel Quick Dry Camping & Travel & Gym Towel. Compact
