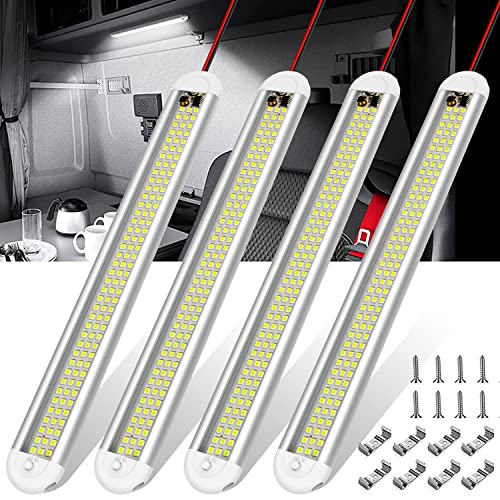
12 Volt LED Strip Lights for RV Interior: The Complete Guide
Transform your camper's interior with energy-efficient, versatile 12V LED strip lighting. Learn how to choose, install, and power the perfect lighting system for your home on wheels.
Shop Recommended LightsWhy Upgrade to 12V LED Strip Lights? If you're tired of harsh, dim, or outdated lighting in your RV, 12V LED strip lights are the solution. They consume minimal power, produce almost no heat, and can be installed in virtually any space—from under cabinets to along ceiling edges. This guide will walk you through everything you need to know to make an informed decision.
Why 12V LED Strip Lights Are Ideal for RV Interiors
RVs present unique lighting challenges. Space is limited, power is finite, and traditional fixtures often waste energy or generate unwanted heat. 12V LED strip lights address all these issues and more. They are designed to run directly off your RV's 12-volt battery system, eliminating the need for power inverters. This direct compatibility means less energy loss and a simpler installation process.
Beyond efficiency, LED strips offer unmatched flexibility. You can cut them to length, bend them around corners, and mount them in places where traditional lights simply won't fit. Whether you want ambient accent lighting or bright task lighting, strips can be tailored to your needs. For those who enjoy camping technology, integrating smart LED controllers can even allow you to change colors and brightness with a smartphone app.
Another significant advantage is their longevity. A quality LED strip can last tens of thousands of hours, far outlasting incandescent or halogen bulbs. This durability is especially important for full-time RVers or those who take frequent trips. When you consider the low maintenance and long lifespan, upgrading to LED strips is a smart investment for any RV owner.
Key Factors to Consider Before Buying
Not all LED strips are created equal. To ensure you get the best performance for your RV, you need to evaluate several key specifications. Understanding these factors will help you avoid common pitfalls and choose a product that meets your specific needs.
1. Brightness and Color Temperature
Brightness is measured in lumens, while color temperature is measured in Kelvin (K). For RV interiors, a color temperature between 3000K (warm white) and 5000K (cool white) is usually ideal. Warm white creates a cozy, relaxing atmosphere, perfect for living areas and bedrooms. Cool white is more energizing and works well in kitchens or workspaces. Many strips are dimmable, allowing you to adjust the brightness to suit the time of day or activity.
2. Power Consumption and Voltage
Since you'll be running these lights off your RV's battery, power consumption is critical. Look for strips with a low wattage per foot. A typical 12V LED strip consumes about 1.5 to 3 watts per foot. For a typical RV interior, a total of 20 to 40 watts is often sufficient. Always check that the strip is rated for 12V DC; using a 24V strip on a 12V system will result in dim or non-functional lights, while a 12V strip on a 24V system will burn out.
3. Waterproof Rating (IP Rating)
The IP (Ingress Protection) rating indicates how well the strip is protected against dust and water. For RV interiors, an IP65 rating is usually sufficient, as it protects against splashes and moisture. However, if you plan to install strips in areas prone to condensation or near sinks, consider IP67 or IP68 for added peace of mind. Non-waterproof strips (IP20) should only be used in completely dry, protected areas.
4. Adhesive Quality and Mounting Options
Most LED strips come with a 3M adhesive backing. While convenient, this adhesive can fail over time, especially in environments with temperature fluctuations. For a permanent installation, it's best to use mounting clips or aluminum channels. These not only secure the strip but also act as a heat sink, extending the life of the LEDs. Channels with diffusers also help create a smoother, more professional light output by eliminating "hot spots."
How to Choose the Right LED Strip for Your RV
With so many options on the market, selecting the right strip can feel overwhelming. Use the following table as a quick reference to match your needs with the appropriate product tier.
| Feature | Entry-Level | Mid-Range | Premium |
|---|---|---|---|
| Adhesive Quality | Basic adhesive, may require clips | Strong 3M adhesive, clips recommended | High-strength adhesive + aluminum channels included |
| Color Accuracy | Standard white, may have slight tint | Consistent color temperature | High CRI (90+) for true-to-life colors |
| Dimmability | Often non-dimmable | Dimmable with compatible controller | Fully dimmable with smart app control |
| Lifespan | ~25,000 hours | ~50,000 hours | ~50,000+ hours with heat management |
| Best For | Budget-conscious, occasional use | Most RVers, daily use | Full-timers, luxury upgrades |
When in doubt, a mid-range option often provides the best balance of performance, durability, and value. If you're planning a comprehensive RV renovation, you might also want to look at other camping gear to complement your lighting upgrade. For those who love to cook outdoors, pairing your new interior lights with a reliable camping stove can enhance your overall camping experience.
Step-by-Step Installation Guide
Installing 12V LED strip lights is a manageable DIY project. Follow these steps for a clean, professional result.
Step 1: Plan Your Layout
Decide where you want the lights. Common locations include under overhead cabinets, along the base of the bed, inside closets, and along ceiling trim. Measure the total length needed and add 10-15% for waste and corners.
Step 2: Gather Your Tools
- LED strip lights (12V DC)
- Power source (existing 12V circuit or new wiring)
- Wire strippers and crimping tool
- Mounting clips or aluminum channels
- Rubbing alcohol and clean cloth
- Soldering iron (optional, for secure connections)
- In-line fuse (recommended for safety)
Step 3: Prepare the Surface
Clean the area where you'll mount the strips with rubbing alcohol. This removes dust, grease, and residue that can prevent the adhesive from sticking. Allow the surface to dry completely.
Step 4: Cut and Connect
LED strips can only be cut at marked intervals, usually every few inches. Use sharp scissors to cut cleanly. If you need to connect multiple strips, use solderless connectors or soldering for a reliable electrical connection. Always ensure the polarity is correct (positive to positive, negative to negative).
Step 5: Mount and Secure
Peel off the adhesive backing and press the strip firmly into place. For added security, use mounting clips every 6-12 inches. If using aluminum channels, slide the strip into the channel before mounting.
Step 6: Wire to Power
Connect the strip to your 12V power source. If you're not using an existing circuit, you can tap into a nearby 12V line. Always install an in-line fuse on the positive wire to protect against short circuits. If you're unsure about wiring, consult a professional.
Powering Your 12V LED Strips
One of the biggest advantages of 12V LED strips is that they can run directly off your RV's house battery. However, you need to ensure your power source can handle the load. A typical 16-foot strip drawing 2 watts per foot will consume about 32 watts, or roughly 2.7 amps at 12V. This is a modest draw that most RV batteries can easily support.
If you're boondocking or want to minimize battery drain, consider pairing your LED strips with a solar charger or a portable power station. These can replenish your battery during the day, allowing you to enjoy your lights at night without worry. For those who want a more integrated solution, a battery and solar panel kit can provide a reliable, off-grid power system for all your RV needs.
It's also worth noting that LED strips are far more efficient than traditional incandescent bulbs. Replacing just a few old fixtures with LED strips can significantly extend your battery life, giving you more time to enjoy the outdoors. If you're looking to further reduce your energy consumption, consider upgrading other appliances, such as a portable fridge, which are designed to run efficiently on 12V power.
Common Mistakes to Avoid
Even a simple project like installing LED strips can go wrong if you overlook key details. Here are the most common mistakes and how to avoid them.
- Using the wrong voltage: Always match the strip's voltage to your RV's system (12V DC). Using a 24V strip on a 12V system will result in poor performance.
- Ignoring power limits: Don't overload a single circuit. Calculate the total wattage and ensure your wiring and fuse can handle it.
- Poor adhesion: Skipping surface preparation or relying solely on adhesive can lead to strips falling down. Use clips or channels for a permanent fix.
- Cutting in the wrong place: Only cut at marked intervals. Cutting elsewhere will damage the circuit and cause a section to fail.
- Forgetting a fuse: An in-line fuse is a cheap insurance policy against short circuits and electrical fires.
Frequently Asked Questions
Can I leave my 12V LED strips on all night?
Yes, LED strips are designed for continuous use and consume very little power. However, if you're boondocking, it's wise to monitor your battery voltage to avoid draining it completely. A single 16-foot strip typically draws less than 3 amps, so it won't deplete a healthy battery overnight.
Do I need a special dimmer for 12V LED strips?
Yes, you need a dimmer specifically designed for 12V DC LED strips. Standard household dimmers are designed for AC power and will not work. Look for a PWM (Pulse Width Modulation) dimmer, which provides smooth, flicker-free dimming.
How do I connect multiple strips together?
You can connect strips in series or parallel, but parallel is generally recommended for longer runs to maintain consistent brightness. Use solderless connectors or solder the connections and cover them with heat shrink tubing for a durable, weather-resistant joint.
Can I use indoor LED strips outside my RV?
Only if they are rated for outdoor use (IP65 or higher). Indoor strips (IP20) are not protected against moisture and will fail quickly if exposed to rain or condensation. For exterior use, look for strips specifically designed for outdoor environments, such as 12V LED strip lights for RV exterior.
What is the best color temperature for an RV interior?
It depends on the area. Warm white (3000K-3500K) is ideal for living spaces and bedrooms, creating a cozy atmosphere. Cool white (4000K-5000K) is better for kitchens and workspaces where you need clear, bright light. Many RVers use a combination of both, or choose dimmable strips that can adjust from warm to cool.
Ready to upgrade your RV's interior lighting? Check out our top picks for 12V LED strip lights below.
View Recommended Products