Setting Up a Tent on a Utility Trailer: The Complete DIY Guide
Transform your standard utility trailer into a stable, elevated camping platform. Discover expert techniques for securing your tent, waterproofing the base, and maximizing comfort off the ground.
VIEW SETUP STEPSWhy Use a Utility Trailer? Camping on a trailer keeps you away from damp ground, crawling insects, and uneven rocks. It's a cost-effective alternative to a dedicated RV or teardrop trailer, especially if you already own a utility trailer for hauling. This guide walks you through the entire process safely.
Why Pitch a Tent on Your Trailer?
Setting up a tent on a utility trailer bridges the gap between traditional tent camping and expensive RV setups. A standard 5x8 or 6x10 trailer provides a flat, level foundation that eliminates the need to search for soft, root-free ground. This elevated position naturally improves airflow underneath you, which is a huge advantage for staying cool in summer and preventing condensation buildup inside your tent. Before you start, you must ensure your trailer is rated for the static weight of the tent and occupants, and never attempt this while the trailer is hitched to a moving vehicle.
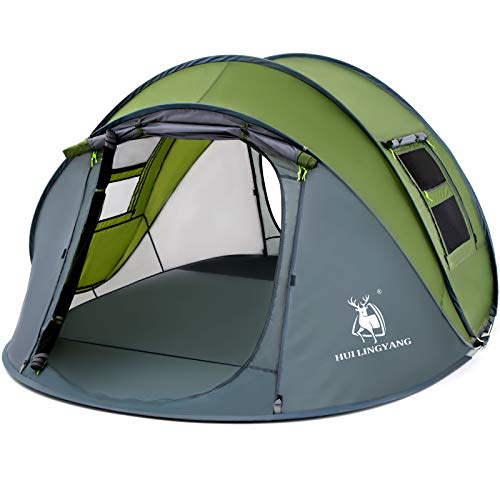
Before loading gear, inspect the trailer bed. A solid wooden or metal deck is non-negotiable; mesh floors or widely spaced planks will need a temporary plywood overlay. You’ll also want to think about the type of tent you’re using. While this guide focuses on standard ground tents, the principles also apply if you’re converting a truck bed tent for trailer use. If you haven't selected a shelter yet, consider looking at instant-setup models that simplify the pitching process on an elevated platform.
Phase 1: Preparing the Trailer Deck
Preparation is the key to a safe and comfortable elevated campsite. Never pitch a tent directly on a rough, splintered trailer surface. Begin with a thorough cleaning to remove any hauling debris, oil, or sharp metal burrs.
1. Deck Reinforcement
If your trailer has gaps between planks, lay a ½-inch sheet of exterior-grade plywood across the bed. Cut it to fit snugly, and sand the edges to prevent tears in your tent floor.
2. Protective Underlay
Place a heavy-duty tarp or a rubber horse stall mat over the deck. This prevents moisture wicking up from the metal or wood and adds an insulating layer. A quality camping tarp also protects the tent floor from abrasive trailer surfaces.
3. Leveling the Trailer
Use a bubble level on the deck. Adjust the trailer's tongue jack or place leveling blocks under the wheels. Sleeping on a slant is uncomfortable and strains the tent seams over time.
Phase 2: Anchoring & Securing the Tent
Wind is the number one enemy of a trailer-mounted tent. Since you can't pound standard stakes into a metal deck, you must get creative with anchoring. The goal is to keep the rainfly taut and the tent body from shifting or blowing away. A secured tent isn't just about comfort—it's a vital aspect of outdoor safety.
Proven Anchoring Techniques
If your tent uses a fiberglass pole structure, ensure the poles aren't under excessive bending stress from the tension of the straps. A freestanding dome tent is generally the easiest style to pitch on a trailer, whereas tunnel tents rely heavily on ground-staked tension. For a list of shelters that work best on hard surfaces, review our guide to tents suitable for non-soil surfaces.
Phase 3: Weatherproofing & Comfort Upgrades
Elevated camping exposes you to wind from all 360 degrees. The under-trailer airflow is great for summer but can freeze you out in cooler temperatures. You'll need to adapt your sleep system accordingly. Start by adding a solid barrier under your sleeping pad. A rigid foam board insulation between the tarp and your tent floor dramatically cuts heat loss, performing similarly to the advanced setups used in winter camping.
For your sleeping comfort, skip the thin roll-up pad. The rigid trailer deck demands plush cushioning. A double-high air mattress with a built-in pump, like those found in our air mattress guide, fits perfectly on a trailer bed and can be inflated in minutes. Or, if you prefer a more traditional route, a premium camping mat combined with a thick wool blanket layer provides excellent insulation without the risk of a puncture.
Don't forget the rain. Even with a rainfly, wind-driven rain can blow up between the tent and the trailer. Create a "bathtub" floor by ensuring the underlying tarp is slightly smaller than the tent footprint so it doesn't collect pooling water. If you plan to cook near the trailer, always use a stable camp stove on a separate ground-level table—never cook with an open flame directly on the wooden deck.
Essential Gear for Trailer Tent Camping
Because a utility trailer offers significant load capacity compared to backpacking trips, you can afford to bring heavier comfort items. However, organization is critical to prevent your platform from becoming a chaotic mess. Use plastic totes that slide neatly under the tent overhang or on the trailer tongue for storage.
Safety Checklist & Final Walkthrough
Before you call it a night, walk around your trailer setup with a critical eye. Check that the coupler is covered (it's a shin-buster in the dark) and that your ladder is stable. Verify that there is no chafing between the tent fabric and sharp metal edges. If you're camping in an area with bears, remember that elevated sleeping is not a substitute for proper food storage safety—always lock food in a bear box or your locked vehicle away from the sleeping area.
Finally, consider the electrical setup. If you brought a portable power station for charging devices, you can run it safely inside a tent vestibule, but ensure it's on a non-flammable surface. For more on power solutions, see our portable power station reviews. With your trailer secured, your tent anchored, and your bed made, you can enjoy the unique thrill of sleeping high and dry, no matter the terrain below.