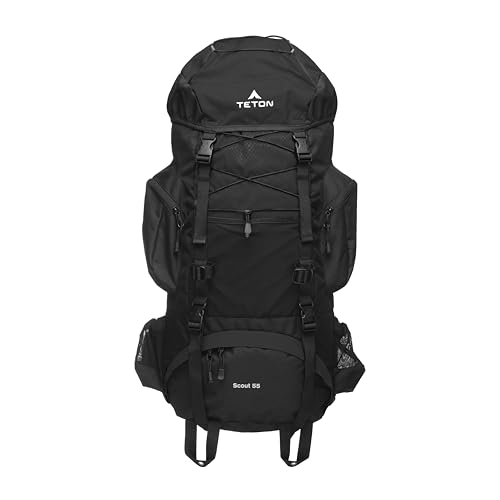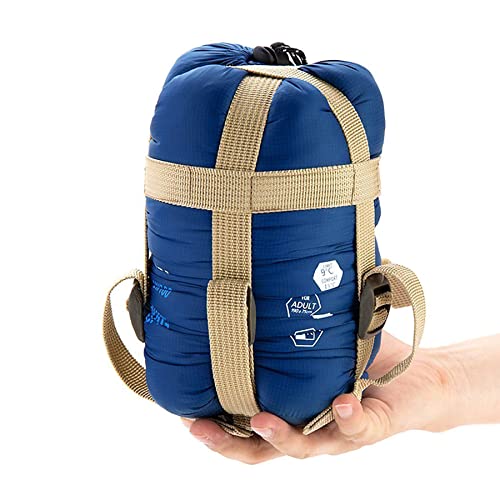
The Complete Guide to Hiking Backpacks with Tent & Sleeping Bag
Streamline your adventure with an all-in-one sleep system. Learn how to choose the perfect integrated backpack, tent, and sleeping bag combo for unmatched convenience on the trail.
VIEW RECOMMENDED COMBOSWhy Choose an All-in-One System? A hiking backpack with an integrated tent and sleeping bag eliminates the guesswork of matching separate components. These bundles are engineered to work together, saving you weight, bulk, and the headache of compatibility issues, so you can hit the trail faster and with confidence.
What Exactly Is a Hiking Backpack with Tent & Sleeping Bag Combo?
This refers to a coordinated sleep-and-carry system, often sold as a bundle or designed as a modular set. The core components—a backpack, a tent, and a sleeping bag—are selected to complement each other in terms of weight, packed size, and thermal efficiency. For the solo adventurer or the budget-conscious beginner, these kits represent a turnkey solution for backpacking checklists. Instead of spending hours researching individual items, you get a pre-matched setup optimized for typical three-season conditions.
The backpack typically features dedicated compartments or straps to secure the included tent and sleeping bag. This design ensures a balanced load, with the heavier tent body often positioned close to your core for better stability on uneven terrain. For those new to the sport, this integration removes a significant barrier to entry, making the preparation for your first backpacking for beginners trip far less daunting.
Key Benefits of a Combined System
Guaranteed Compatibility
The tent poles are sized to fit your pack's side pockets, and the sleeping bag's compressed volume matches the designated stuff sack. No more arriving at camp to find your bag doesn't fit in the tent's vestibule.
Cost-Effective Entry
Purchasing a kit is almost always cheaper than buying a high-quality backpack, tent, and sleeping bag individually. Manufacturers reduce packaging and marketing costs, passing the savings directly to you.
Streamlined Packing
The entire sleep system is designed to nest together. A well-designed combo can reduce your total packed volume by up to 15% compared to mismatched gear, leaving more room for food and a camping kitchen.
Beginner-Friendly
Overwhelmed by choice? A curated combo removes analysis paralysis. You receive a tested setup that's ready for the trail, letting you focus on learning skills like setting up a tent and planning your route.
How to Choose the Right Hiking Backpack Combo
Selecting the perfect system requires balancing three critical factors: weight, capacity, and temperature rating. Your choice will depend entirely on the type of camping style you plan to pursue, whether it's a short weekend trek or a week-long backcountry expedition. A system ideal for car camping will be completely unsuitable for a multi-day summit attempt.
1. Understanding Weight Classes
-
Ultralight (Base Weight Under 8 lbs)
These kits are for ounce-counters tackling long-distance trails. They typically use a minimalist frameless pack, a single-wall trekking-pole tent, and an 800+ fill-power down bag. A complete setup in this class costs from $600. The trade-off is durability and interior space.
-
Lightweight (Base Weight 8-15 lbs)
The sweet spot for most weekend warriors. You'll get a comfortable internal-frame backpack, a spacious two-wall tent, and a synthetic or lower-fill-power down bag. These combos, starting at $300, offer the best balance of comfort, durability, and weight for standard spring camping checklist adventures.
-
Traditional (Base Weight 15+ lbs)
Built for comfort and value. These kits prioritize plush suspension systems, large freestanding tents, and roomy rectangular sleeping bags. With prices starting around $180, they are perfect for short hikes into a basecamp or for those prioritizing a good night's sleep over trail weight.
2. Backpack Fit and Capacity
A backpack that doesn't fit is a painful experience. For these combos, look for an adjustable torso length and a padded hipbelt designed to carry the total weight of your gear, food, and water. For a 2-3 day trip with an all-in-one kit, a 50–65 liter pack is ideal. The pack must have a designated sleeping bag compartment and side compression straps that can also hold your tent poles. Always consult the manufacturer's sizing chart, as a properly fitted camping backpack transfers 80% of the weight to your hips.
3. Tent Design and Seasonality
The tent in a combo is almost always a three-season dome or tunnel tent, suitable for spring through fall. You must assess its waterproof rating, indicated by a Hydrostatic Head (HH) of at least 1,500mm. This is crucial for staying dry in a sudden storm, a key tip from our rainy season checklist. Freestanding designs are easier to pitch on rocky ground, while non-freestanding tents save weight but require staking. Ensure the tent's packed size fits either inside your pack or securely between the bottom straps, a key detail for maintaining pack balance.
4. Sleeping Bag Insulation and Temperature
The sleeping bag's temperature rating is your lifeline. For most three-season use, an EN/ISO Comfort rating of 20°F to 30°F is versatile. Down insulation offers the best warmth-to-weight ratio and compressibility but loses its power when wet. Synthetic insulation is heavier but insulates even when damp and is more affordable. Match the bag's packed volume to your backpack's integrated stuff sack to ensure it fits without compressing too tightly, which damages insulation over time. For winter outings, you would need a dedicated setup from our winter camping gear guide.
Comparing All-in-One Combo Types
| Feature | Ultralight Bundle | Lightweight Kit | Traditional Set |
|---|---|---|---|
| Total Weight | Under 8 lbs | 8–12 lbs | 12–18 lbs |
| Price Range | $600–$1,200 | $300–$600 | $180–$350 |
| Best Use Case | Long-distance trekking, FKT attempts | Weekend backpacking, section hiking | Basecamping, beginner trips, car-to-trail |
| Tent Example | Single-wall, trekking pole setup | Freestanding double-wall dome | Large freestanding cabin-style |
| Sleeping Bag | 800+ fill down, 30°F rating | 650 fill down or high-end synthetic | Synthetic fill, 20°F-30°F rating |
| Backpack Volume | 40–50L, frameless or minimal frame | 50–65L, internal frame | 65–75L, plush suspension |
How to Pack Your Combo Correctly
Loading your pack properly is just as important as the gear itself. Start by placing your sleeping bag in the dedicated bottom compartment. If your tent is wet, strap it to the outside of your pack using the bottom compression straps to avoid soaking the rest of your gear. The tent body and poles can be broken down: the poles often slide neatly into a side water bottle pocket, while the folded fabric body goes into the main compartment, pressed against your back for the most centralized weight. Your camping items like a stove and food should sit in the middle, with your puffy jacket on top for quick access. The goal is a balanced pack that feels like a part of your body, not a heavy sack pulling you backwards.
Pro Tip: Extending the Life of Your System
Never store your sleeping bag compressed in its stuff sack for long periods. Hang it in a closet or store it loosely in the large mesh storage sack provided. After a trip, air out your tent completely to prevent mildew, which can destroy waterproof coatings. Before your next adventure, review your ultimate camping packing list to ensure your combo is complete and ready to go. A well-maintained system can last for over a decade of adventures.
The decision ultimately comes down to your personal hiking philosophy. Are you a gram-counting minimalist, or does the promise of a comfortable, spacious camp at the end of the day drive you? By understanding the integration of these three critical components, you can bypass the costly process of trial and error. Investing in a well-matched hiking backpack with tent and sleeping bag combo is one of the smartest moves you can make to ensure your journey is defined by the views, not the weight on your back.