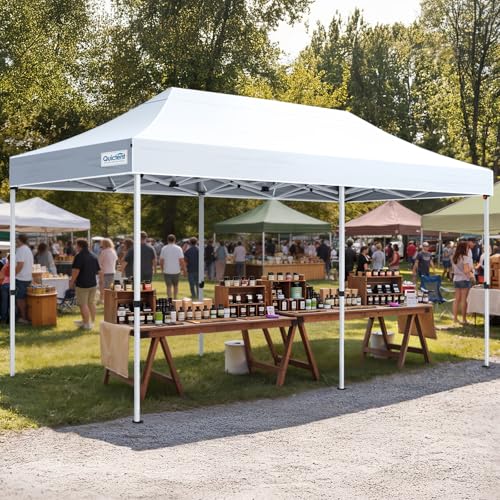
10 x 20 Pop Up Canopy Tent: The Definitive Buyer's Guide
Master the market for large instant shelters. We break down frame materials, commercial-grade fabrics, and setup mechanics so you can invest in a canopy that lasts.
Why a 10x20? Spanning 200 square feet, this footprint is the gold standard for vendor booths, tailgates, and spacious outdoor gatherings. It balances expansive coverage with a frame that two people can typically handle. This guide is built for buyers who need to know the difference between a weekend warrior canopy and a semi-permanent commercial shelter.
Heavy-Duty vs. Standard: Choosing Your Frame
The frame is the skeleton of your shelter, and in the 10 x 20 category, the stakes are higher due to the larger surface area catching wind. You’re generally looking at two tiers, and understanding the structural engineering here is critical for safety and longevity.
Standard-Duty Frames
Typically constructed from thin-gauge steel or basic aluminum with plastic connectors. These frames are lighter (often under 70 lbs) and more affordable, usually in the $200–$500 range. They are suitable for occasional use in calm, predictable weather—like a backyard party or a one-day market stall. However, repeated setup and takedown can fatigue the trusses rapidly.
Commercial-Grade Frames
Engineered with hexagonal or octagonal aluminum uprights, reinforced steel trusses, and steel-reinforced peak joints. Expect thicker wall tubing (often 1.5mm+) and cross-cable systems. These heavy-duty shelters typically start at $800 and can reach $2,500. They are designed for frequent professional use, resisting flex under wind loads, making them a far smarter investment for vendors or long-term setups.
If you are setting up at events like those detailed in our car camping checklist or outdoor markets where reliability is non-negotiable, a commercial-grade frame is the only way to guarantee your shelter doesn't become a liability.
Decoding Canopy Tops: Polyester vs. Polyethylene
The top material determines waterproofing longevity and UV protection. While most 10x20 tents use polyester, the density (Denier, or "D") is a common marketing trick you need to see through. Weight and coating matter more than the number alone.
| Material Type | Typical Denier | Best For | Price Indication |
|---|---|---|---|
| Entry-Level Polyester | 150D - 300D | Light sun shade, occasional use | $250 - $500 |
| PU-Coated Oxford Polyester | 500D - 600D | All-weather, professional vendors | $800 - $1,500 |
| Vinyl-Laminated Polyester | 600D+ | Semi-permanent, extreme weather | $1,800+ |
A critical feature to look for is a PU (polyurethane) coating on the inside of the top. This isn't just about repelling rain; it provides resistance to hydrostatic pressure. Fire-retardant certification (CPA-84 or NFPA-701) is also mandatory if you intend to use the tent at public markets or festivals. For more on how to keep your gear safe in the elements, review our rainy season checklist.
Essential Sidewalls and Weight Bags
A 10x20 frame with just a roof is a kite waiting for a gust. The system’s stability comes from accessories that many buyers incorrectly treat as optional add-ons. A set of high-quality sidewalls transforms your open canopy into a protected, lockable room, which is vital for storing camping gear or merchandise overnight.
The most crucial safety and setup feature is the anchoring system. Relying on thin ropes and flimsy stakes is a proven failure point. You must budget for proper weight bags. For a 10x20 canopy, you need a minimum of 40 lbs per corner leg, meaning 160 lbs of total ballast. We recommend investing in commercial-grade zippered weight bags filled with sand or steel. Without this, you risk structural collapse in gusts, which endangers people and equipment alike—especially relevant if you are camping in exposed locations similar to those discussed in our beach camping checklist where wind is a constant factor.
Setup Efficiency: Two-Person Logic for a Large Span
Do not believe marketing that claims a single person can easily set up a 200-square-foot canopy. While the central frame may "pop up," extending the 20-foot trusses and lifting the frame against its own leverage absolutely requires two adults. Attempting it solo leads to twisted joints and broken peak connectors. Practicing a two-person drill in your backyard before a trip is as essential as testing your camping stoves before you leave.
- Step 1: Frame First. Fully extend the outer frame into a 10x20 rectangle before raising it.
- Step 2: Top Deployment. Drape the canopy top over the collapsed center poles, then gently lift the center peaks.
- Step 3: Corner Anchors. Immediately attach the 40lb weights to the four corners before the legs are fully height-adjusted.
- Step 4: Cross-Cable Tension. Engage all cross-cables or truss clips to give the frame its rigid lateral strength.
If you're setting up in a high-traffic environment like a campsite, ensure you have clear pathways. This level of logistical planning mirrors the approach we recommend in our family camping checklist, where multiple pieces of large equipment must coexist safely.
Commercial Applications and Long-Term Value
For business users, the 10x20 is an asset, not just equipment. A well-maintained aluminum frame with a 600D top can last 5–7 seasons of weekly use. The alternative—buying a $300 standard canopy annually—ends up costing significantly more than investing $1,500 upfront. This logic applies equally to avid campers who treat their camping gear as a long-term investment. When evaluating options, check the warranty length; a limited lifetime warranty on the frame is a good indicator of the manufacturer's confidence in their engineering.
Also, think about part availability. The best brands offer replacement tops, truss bars, and peak hubs. Because 10x20 tops take constant UV beating, you will eventually need to replace the fabric skin while the frame remains perfectly functional. Factor this into your decision. This is a purchase where you should definitely consider the advice in our are expensive tents worth it guide.